Quick Start Guide to upload a PDF to print and ship to many addresses in one transaction (2 min read)
This feature enables you to send the same print to many people in one simple transaction!
Here's how:
1.) Upload your PDF by clicking the green "Start Here" button on printMe1.com.
2.) Set your quantity to 1. This means each recipient will receive 1 print of the PDF.
3.) Choose/confirm your print type and binding type for the print. We only print double sided.
4.) Your Details page: Input your credit card billing address. Then click "Continue to shipping".
5.) Shipping: Click "Manage CSV Addresses".
6.) Read the info on that page about formatting your csv. (Sample "One to Many" CSV: click here. This is a basic CSV with the minimum amount of information required to ship one PDF to many recipients.
Note: The CSV data overrides any data entered prior and uses the PDF you uploaded. This example is using the quantity, print & binding details set from the user interface. Those can be overridden by inputting that info in the CSV.
7.) Upload CSV, and review the displayed recipient information, & if correct, click "Replace all shipping details with these.." and return to shipping.
Note: If you see any warning messages, here you can fix them in your CSV and re-upload it again.
8.) Shipping: If everything was correct in your CSV, most will just click the green "Continue to Purchase" button. Also, you can toggle through each address if you want to change something. Use the gray dropdown menu to select an address to review & edit in the display box.
9.) Review your Order: This is the itemized checkout detail. The site automatically calculates and displays the shipping and printing cost to each recipient.
10.) Pay and checkout. Your job is underway. Perfect!
Read on for more information about the details of this feature.
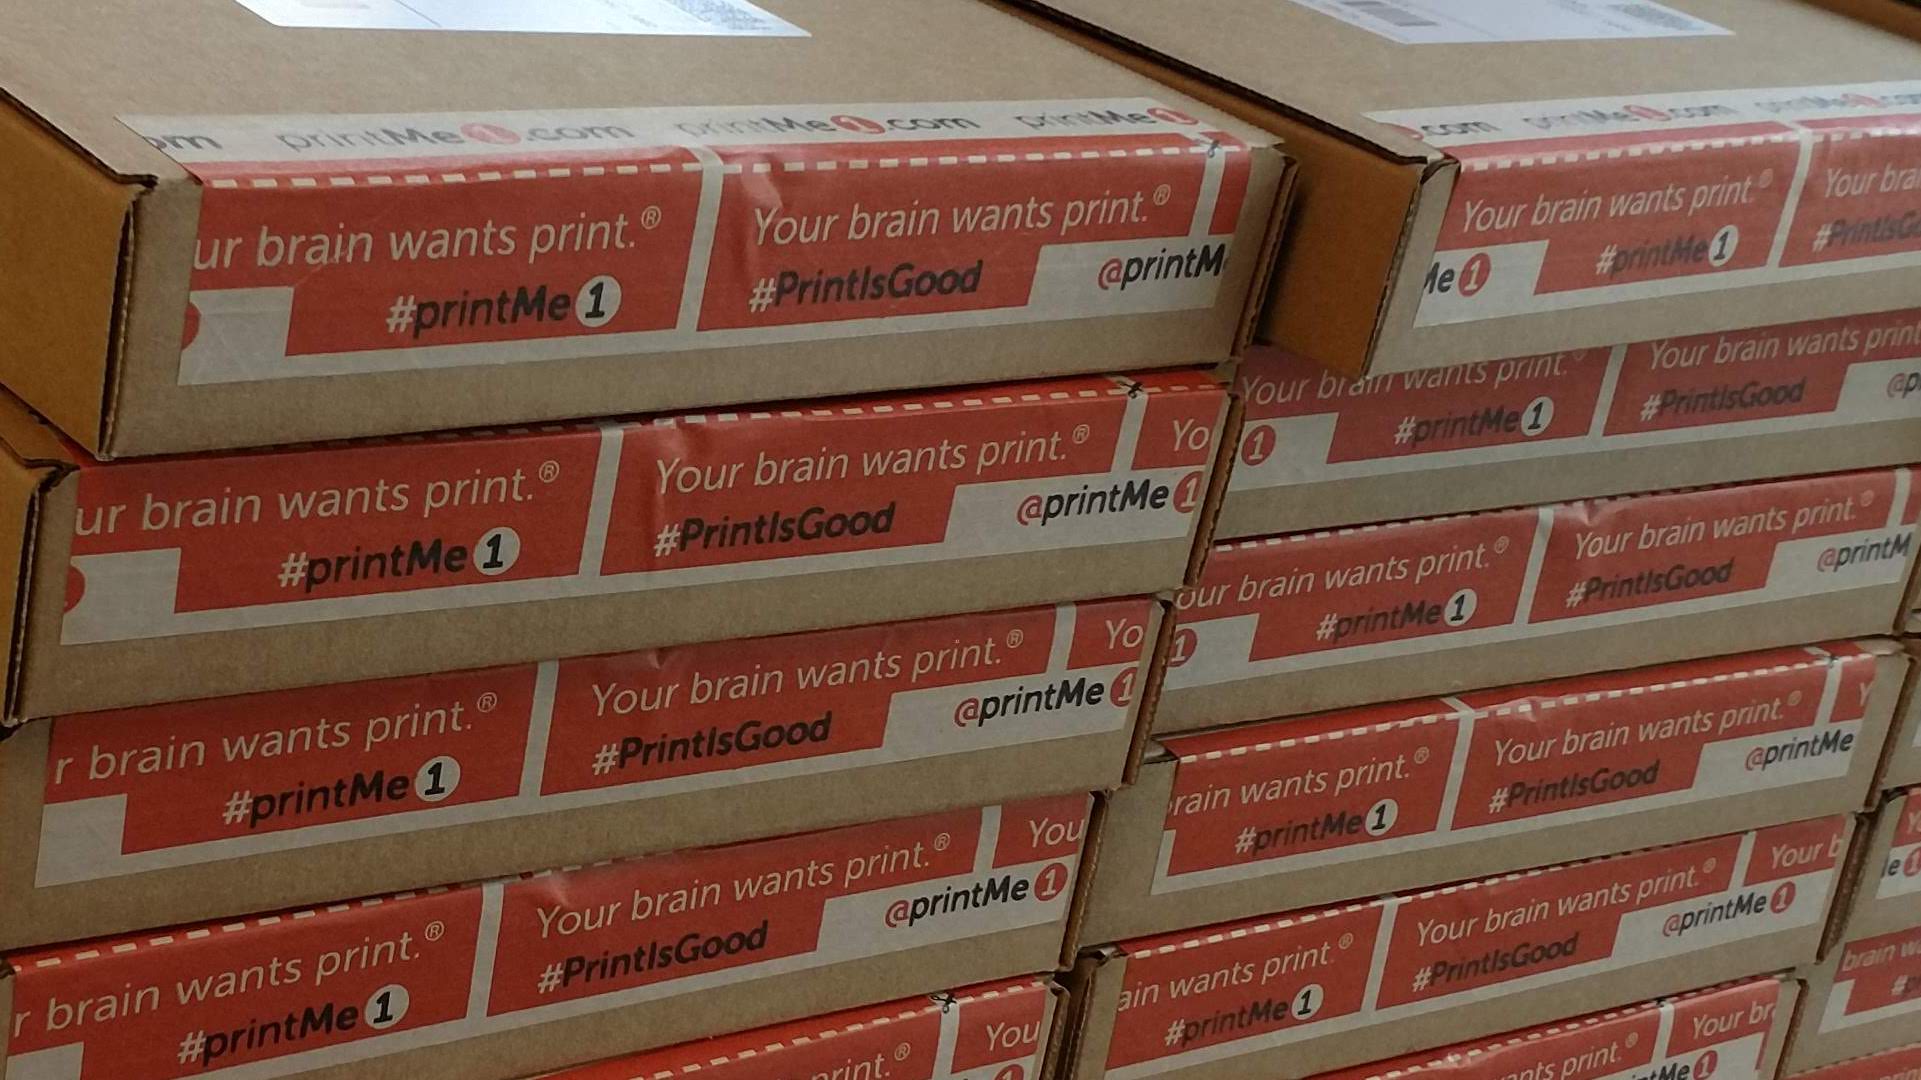
Introduction
[Updated 11-13-21: The spreadsheet formatting was changed]
This feature is really unique. If you've been looking for a way to have a PDF printed and distributed to everyone in your group in one batch, the mad scientists of PDF printing at printMe1.com have you covered!
We created an amazing feature that lets a print buyer send one pdf (or set of PDF's) to every user on their list, and does this in a single transaction at the same price as if each user had placed their own order.
We call this our One to Many™ feature and it's super easy to use, and really powerful at the same time.
Let's start with three questions to help identify who this feature is designed for:
1.) Do you have a PDF that you use in a large group setting that you want to distribute in print to everyone in the group?
2.) Do you or your organization pay for the printing?
3.) Do you have the addresses of the recipients in a spreadsheet format?
If you answered "Yes" to all of these, then you'll want to read on about printMe1.com's One to Many™ print distribution feature.
This post will explain how it works and guide you through a typical One to Many™ order using screenshots and also provide more detail on how to prepare and place a One to Many™ order using our site. If you have a situation where each recipient receives a different PDF specific to them, we cover that situation here.
There's also a testimonial from one of our very first users of the feature you will definitely want to check out.
Note: If you have questions on implementing this feature the first time, please feel free to contact us for assistance. We will send you a demo CSV template and can review your order before you pay.
Here we go!
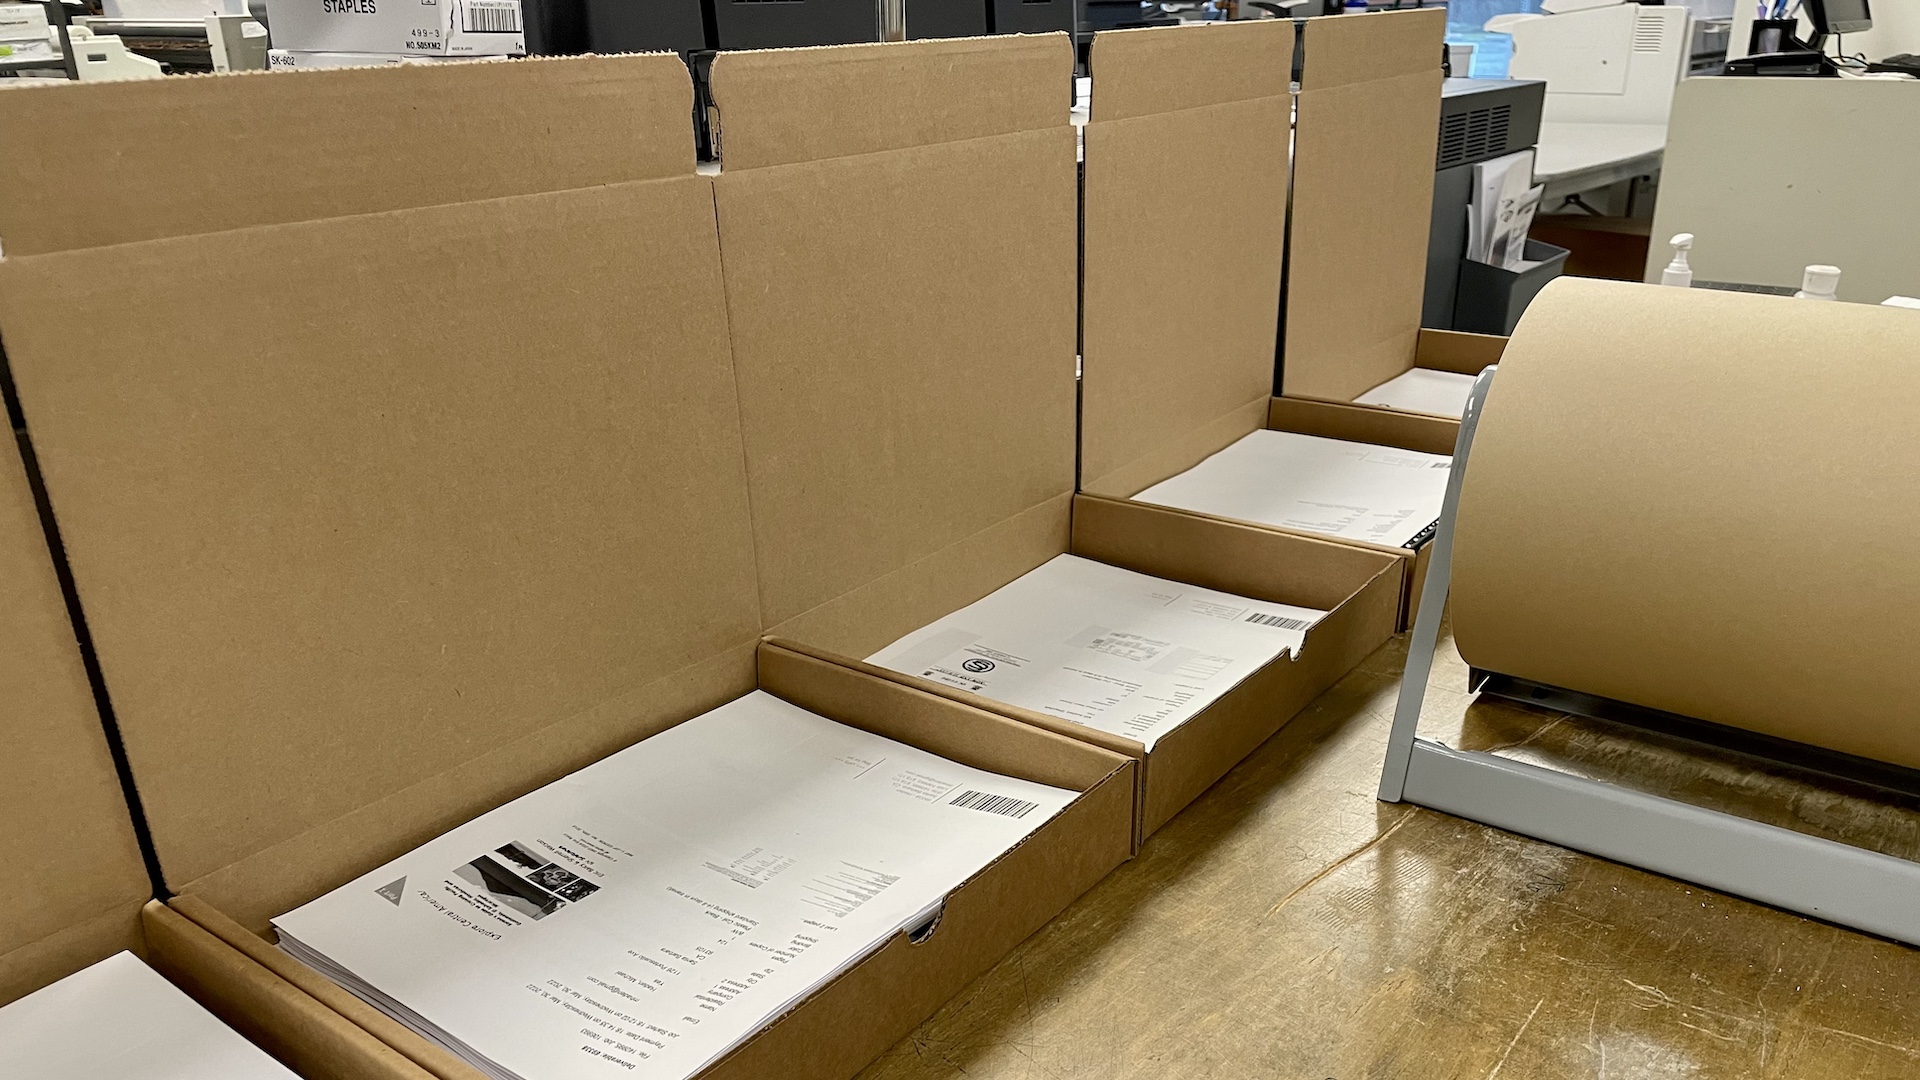
How Does One to Many™ Printing Work?
The One to Many™ feature is designed for distributing print to groups and, for situations where the group leader has a PDF or set of PDF's all users are required to use in print, and wants to automatically ship the print materials to the group recipients from a list of addresses already on file.
When the One to Many™ order is placed, the print buyer starts by clicking the green "Start Now" button and uploads the PDF (or set of PDF's) each recipient will receive, then inputs the printing and binding types for the prints, then in Shipping uploads a CSV file of names and addresses, then pays for the order by credit card. The site will automatically calculate the price based on the cost for printing, binding, and shipping to each individual address as if each recipient placed their own order, except in this case, the print buyer pays for the total order.
Once the payment is received from the print buyer, almost instantly from clicking the payment button, our site processes the PDF or set of PDF's, and creates an individual print order for each recipient that goes to our print shop as if each order was placed individually. Each job is printed in our standard format which is double-sided, and for bound items comes with a clear front cover and black vellum back cover. Prints that are too large to be bound are shrink wrapped and can be three hole punched to use in a binder. (Three hole punch is required by the USPS to ship Priority.) Orders ship in 48 business hours, unless the list exceeds 100 addresses, in which case please contact us if you need to confirm a time estimate. Typically, larger orders over 100 units ship on the same timeline as our standard jobs, except please allow an addition day for production per each set of 75 addresses over 100.
[Note: The One To Many ™ feature differs from our PDF Hosting options because in the PDF Hosting situations, the recipients place their own individual orders from the PDF Hosting link, and each recipient inputs their own address. The recipients in PDF Hosting initiate placing their own individual orders. In a One to Many™, the group leader is initiating the print order to be sent to all recipients at the same time.
Also in PDF Hosting, payment for the print can be from either party- hoster or recipient- and that detail is set by the PDF Hoster. If you want to read more about PDF Hosting, click here. ]
Real World Use Cases
One to Many™ Use Case
This feature is designed for distributing PDF's in print to large groups, where the lead person has all of the recipients shipping information in a CSV format, and the lead person initiates and pays for the printing to everyone in a single transaction.
Some situations the One to Many™ feature can assist with:
An instructor, professor, or teacher who needs to send an OER or their own textbook to all students at their home addresses.
An HR director who needs to send a policy manual to all employees at their home addresses.
A manager who needs to send a document to all staff at multiple locations.
A sales marketing director who needs to send a catalog to clients at their office addresses.
An event coordinator who needs to send a packet to all attendees in advance of the event to their address of record.
A chairperson of a board who needs to send a print of a meeting packet to all board members to their home addresses.
You get the idea :)
Review from a Professor:
The following review was from a real world use case for this feature for a higher-ed course where the students were remote, and the instructor needed to send each student a print of their own custom textbook for the course. The institution was paying for the print distribution costs, and the department was able to export the names & mailing addresses of the students from a spreadsheet in a CSV format.
"It was a pleasure working with printMe1! Like many professors, trying to teach during the pandemic, I was at a loss as to how to get my hundreds of pages of probability notes to students, all around the country. I was happy to post the notes online, but students much prefer being able to read a hard copy. I called up many printing companies. Many companies were happy to print and bind my notes, but not to mail them. Many companies were outrageously expensive. Finally I found printMe1. PrintMe1 printed and bound my notes into a 450 page book, with a front and back cover. They then mailed the book to over a hundred students all over the country. The whole time, I dealt directly with one company member, Matt, who answered all my questions, responded to emails right away, and even resent 2 copies that got lost. The total cost was half that of other companies, and all my students got their books within about a week. A genuinely great experience that I will definitely repeat!"
-- Mor Harchol-Balter, Carnegie Mellon University
Getting Started
For this feature, you need a PDF or set of PDF's that each user on the list will receive. You need to have these located on your device, preferably a computer or laptop. You also need to have a list of names and addresses in a spreadsheet format.
Spreadsheet Formatting to CSV
One to Many™ Use Case
During a One to Many order, our site will ask for a CSV file of the names and addresses. Here we'll show you how to format your CSV so our site accepts it.
Here is a sample CSV:
This CSV is for a job with 4 recipients. Each are receiving the same set of PDF files we have uploaded, so the Filename column is left blank since everyone gets a set of each file that was uploaded. Saying it again, when the filename is blank, it means each recipient receives a print of any PDF's that were uploaded.
The CSV fields for Quantity, Method, and Binding have priority over the details provided at upload. If the fields are left blank, that means that the default set when the files were uploaded will be used. In this case, we are using the defaults, so these fields are blank in the CSV.
Tip: Quantities can vary per recipient if needed. An example is if a manager is sending different quantities to each office, depending on the number of employees at each office.
The shipping field will default to standard shipping if left blank. In this example, we populated it because we have 2 users with "standard" shipping and 2 users with "priority" shipping.

Here are the CSV formatting instructions:
Each row in your CSV should represent an address.
The columns in your uploaded CSV are very important:
Each row in your CSV should represent an address. The columns in your uploaded CSV are very important, so listen carefully, I shall say this only once.
| 1 A | 2 B | 3 C | 4 D | 5 E | 6 F | 7 G | 8 H | 9 I | 10 J | 11 K | 12 L | 13 M | 14 N | 15 O |
|---|---|---|---|---|---|---|---|---|---|---|---|---|---|---|
| Filename | Quantity | Method | Binding | Shipping | Name | Phone | Company | Address 1 | Address 2 | City | State | Zip | Country |
- Column 1: The filename you wish to be sent to the address on this line (this needs to match exactly to the filename as it was uploaded to the order). If you want the address to receive all the files in the order, simply leave this blank, rather than repeat the address lots of times.
- Column 2: The number of copies to send to this address, if you leave it blank we'll set it to 1.
- Column 3: The print method to use, if different to the method chosen at upload.
- bw: B/W
- color: Color
- 1stpcolor: 1st page color
- Column 4: The binding type to use after printing, if different to the binding chosen at upload.
- 3hp: Three Hole Punch - Only available with priority shipping
- comb: Comb bind - Our standard
- coil: Plastic coil
- velo: Velo binding
- wire: Silver wire
- none: No binding - Only available with priority shipping
- Column 5: The Shipping Method to use, by default (if left blank) we'll use Standard Shipping, possible values are:
- standard: Standard shipping, 4-9 days in transit
- priority: Priority shipping, 3-4 days in transit
- Column 6: The full name of the recipient.
- Column 7: The email address of the recipient (for postal tracking purposes).
- Column 8: The telephone number of the recipient (for postal tracking purposes).
- Column 9: The company name at the address (if applicable).
- Column 10: The first line of the recipients address.
- Column 11: The second line of the recipients address (if applicable).
- Column 12: The town or city of the recipient.
- Column 13: The state of the recipient.
- Column 14: The ZIP code of the recipient.
- Column 15: The country of the recipient, e.g. US.
Starting a One to Many™ Order
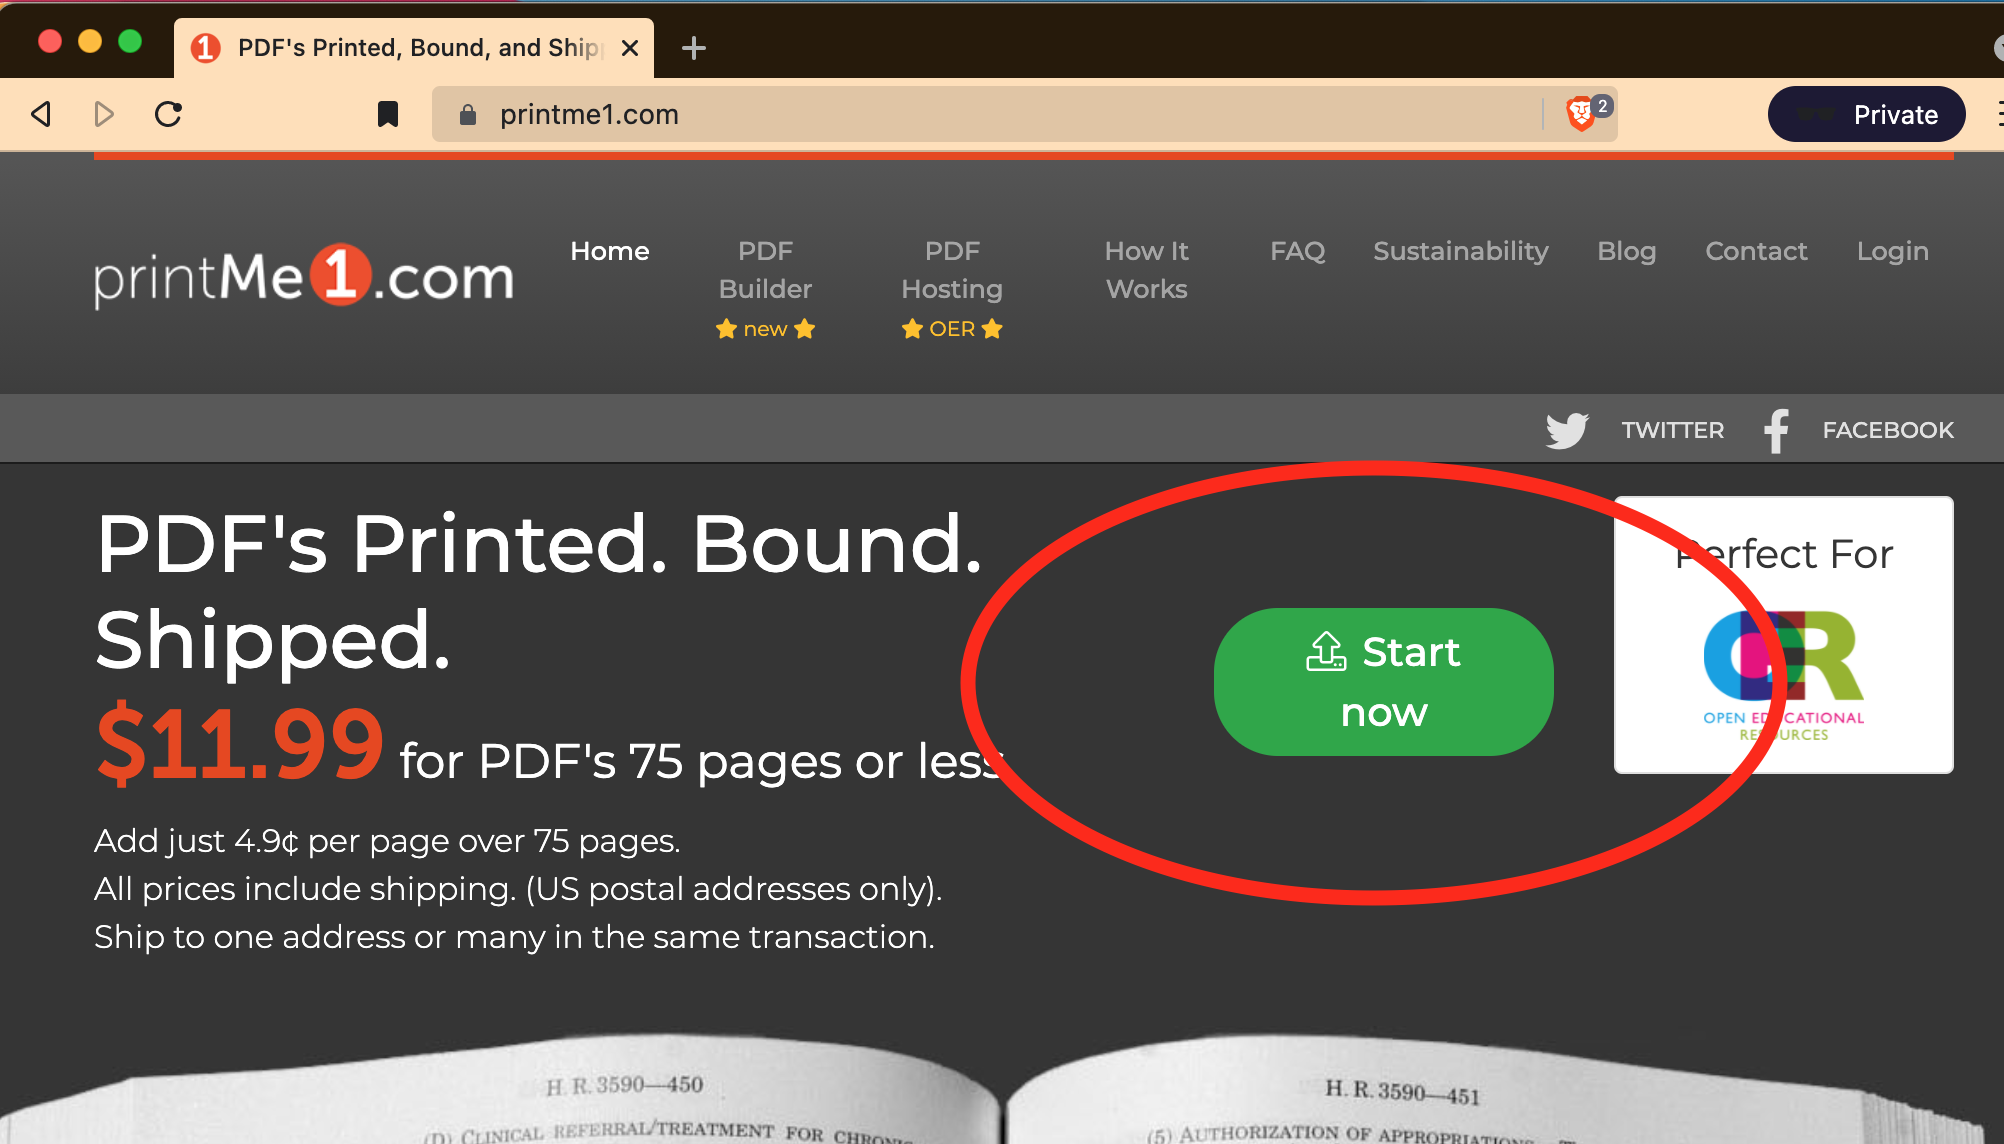
A One to Many™ starts the same way as every other order in our Simple Print Service™ by clicking the green "Start Now" button.
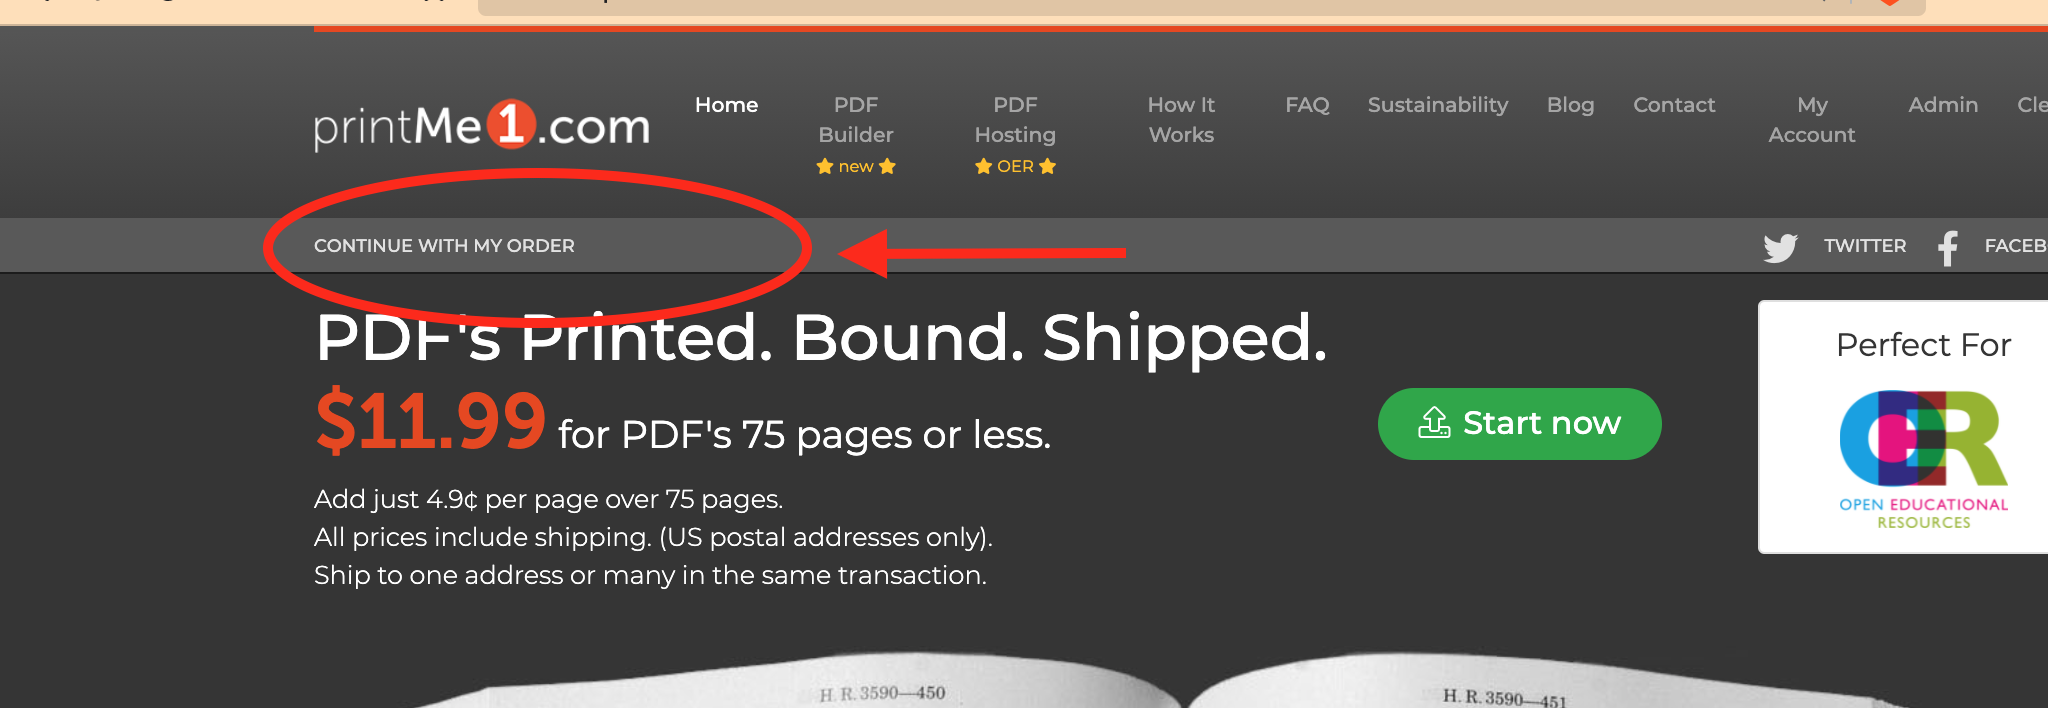
Important Tip: How to advance into checkout if you are returning to the site from a prior session with an upload
If you are returning to the site from a prior session and want to use the file you uploaded, click "Continue my previous order" under the logo. The site will not allow the same PDF to be uploaded more than once in the same session. Just click "Continue my previous order" to advance to checkout. The site will store prior activity in your browser.
Step 1: Upload PDF's
Select your PDF's. To select multiple PDF's you can use a "Command"+"Shift" to select different PDF's to upload at the same time.
For this example, we'll have the two different PDF's going to each address. If you only have one PDF to ship in your real life situation, this example will work for just one PDF if that's all you need to print. When the browser window opens up on your device, find and select your PDF or set of PDF's that need to be printed for each recipient. If you select multiple PDF's, each recipient will receive a print of each one in the same shipment.
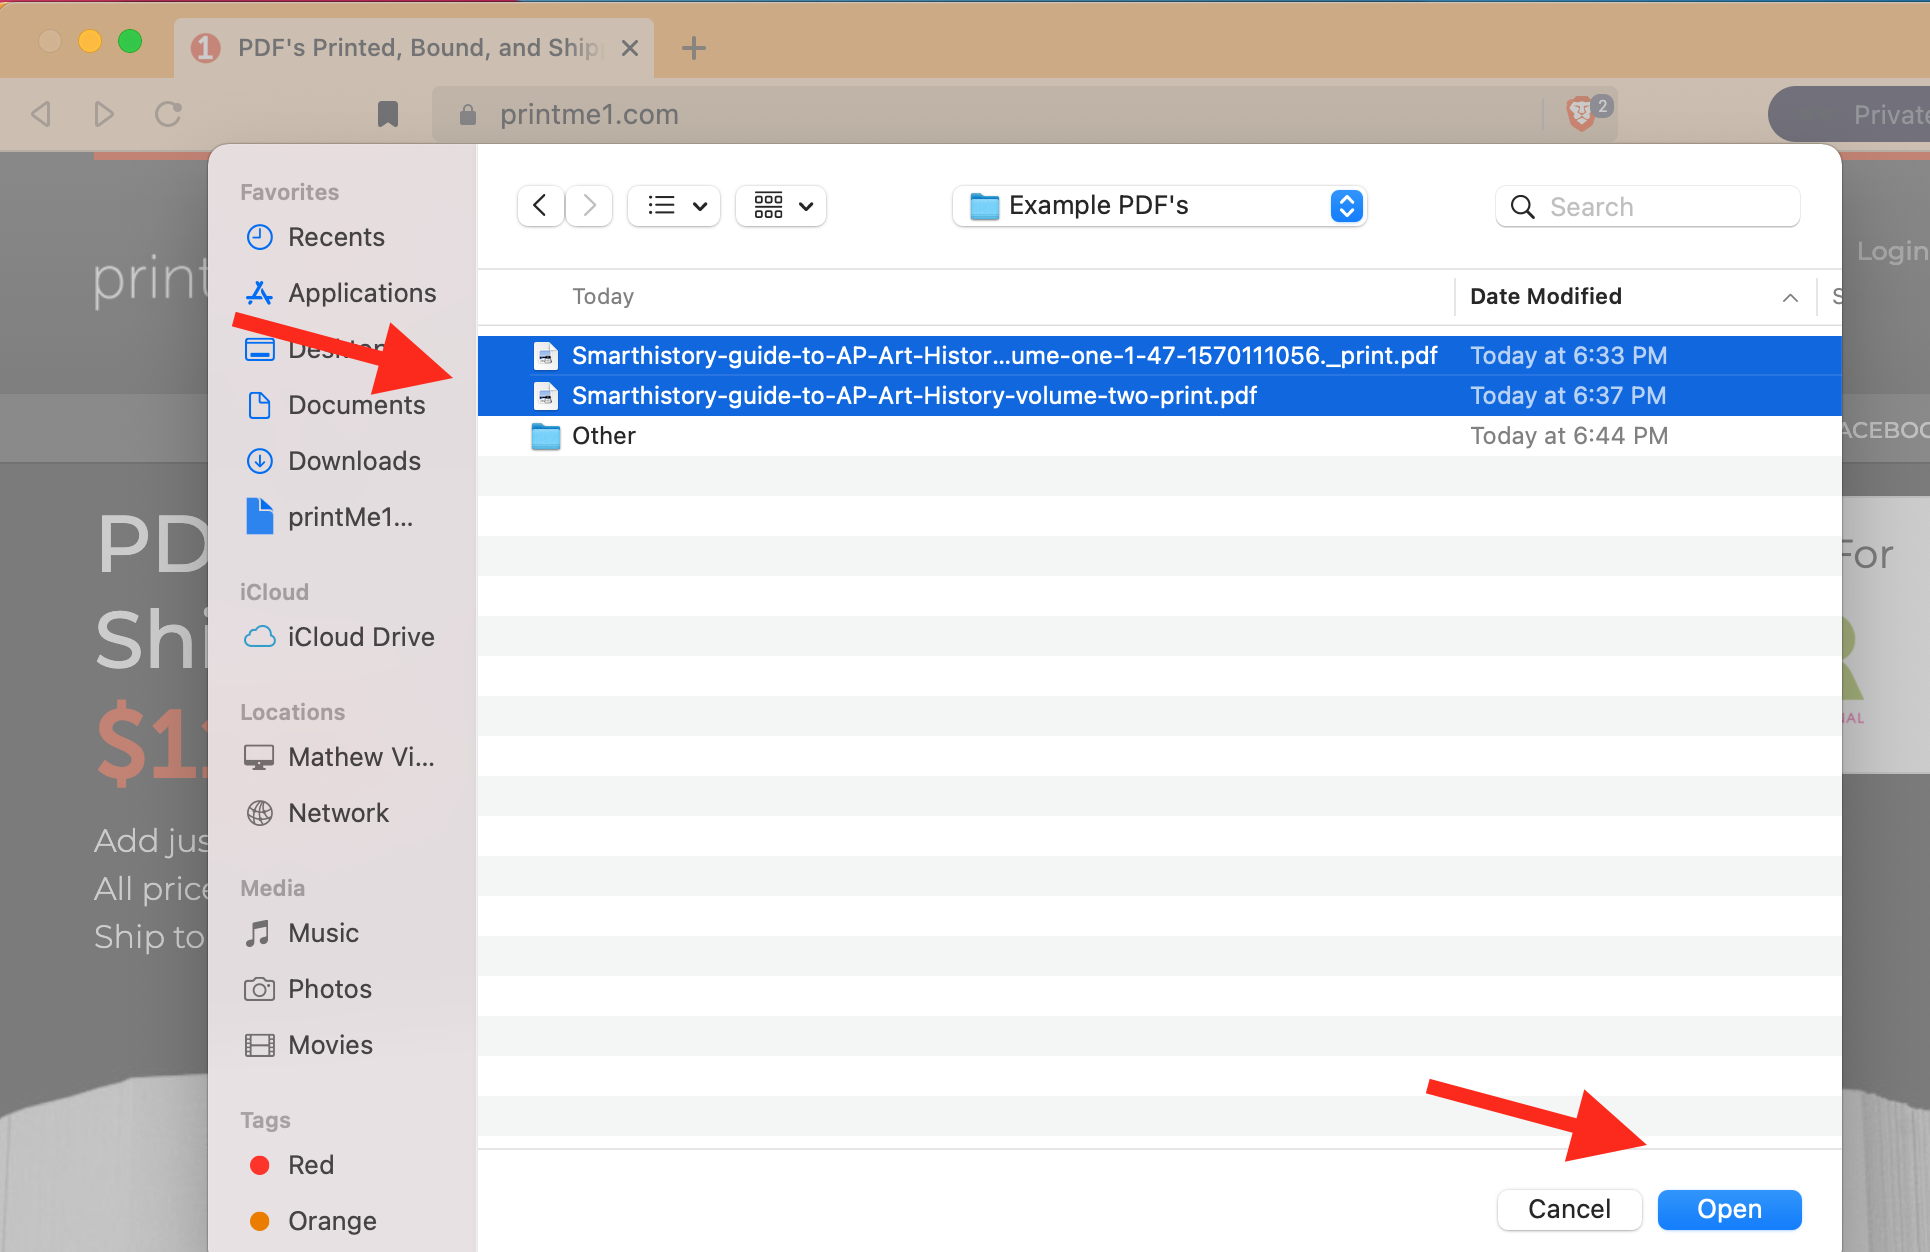
There are other uses for this feature that allow each recipient to receive a specific PDF which will be covered in a separate guide.
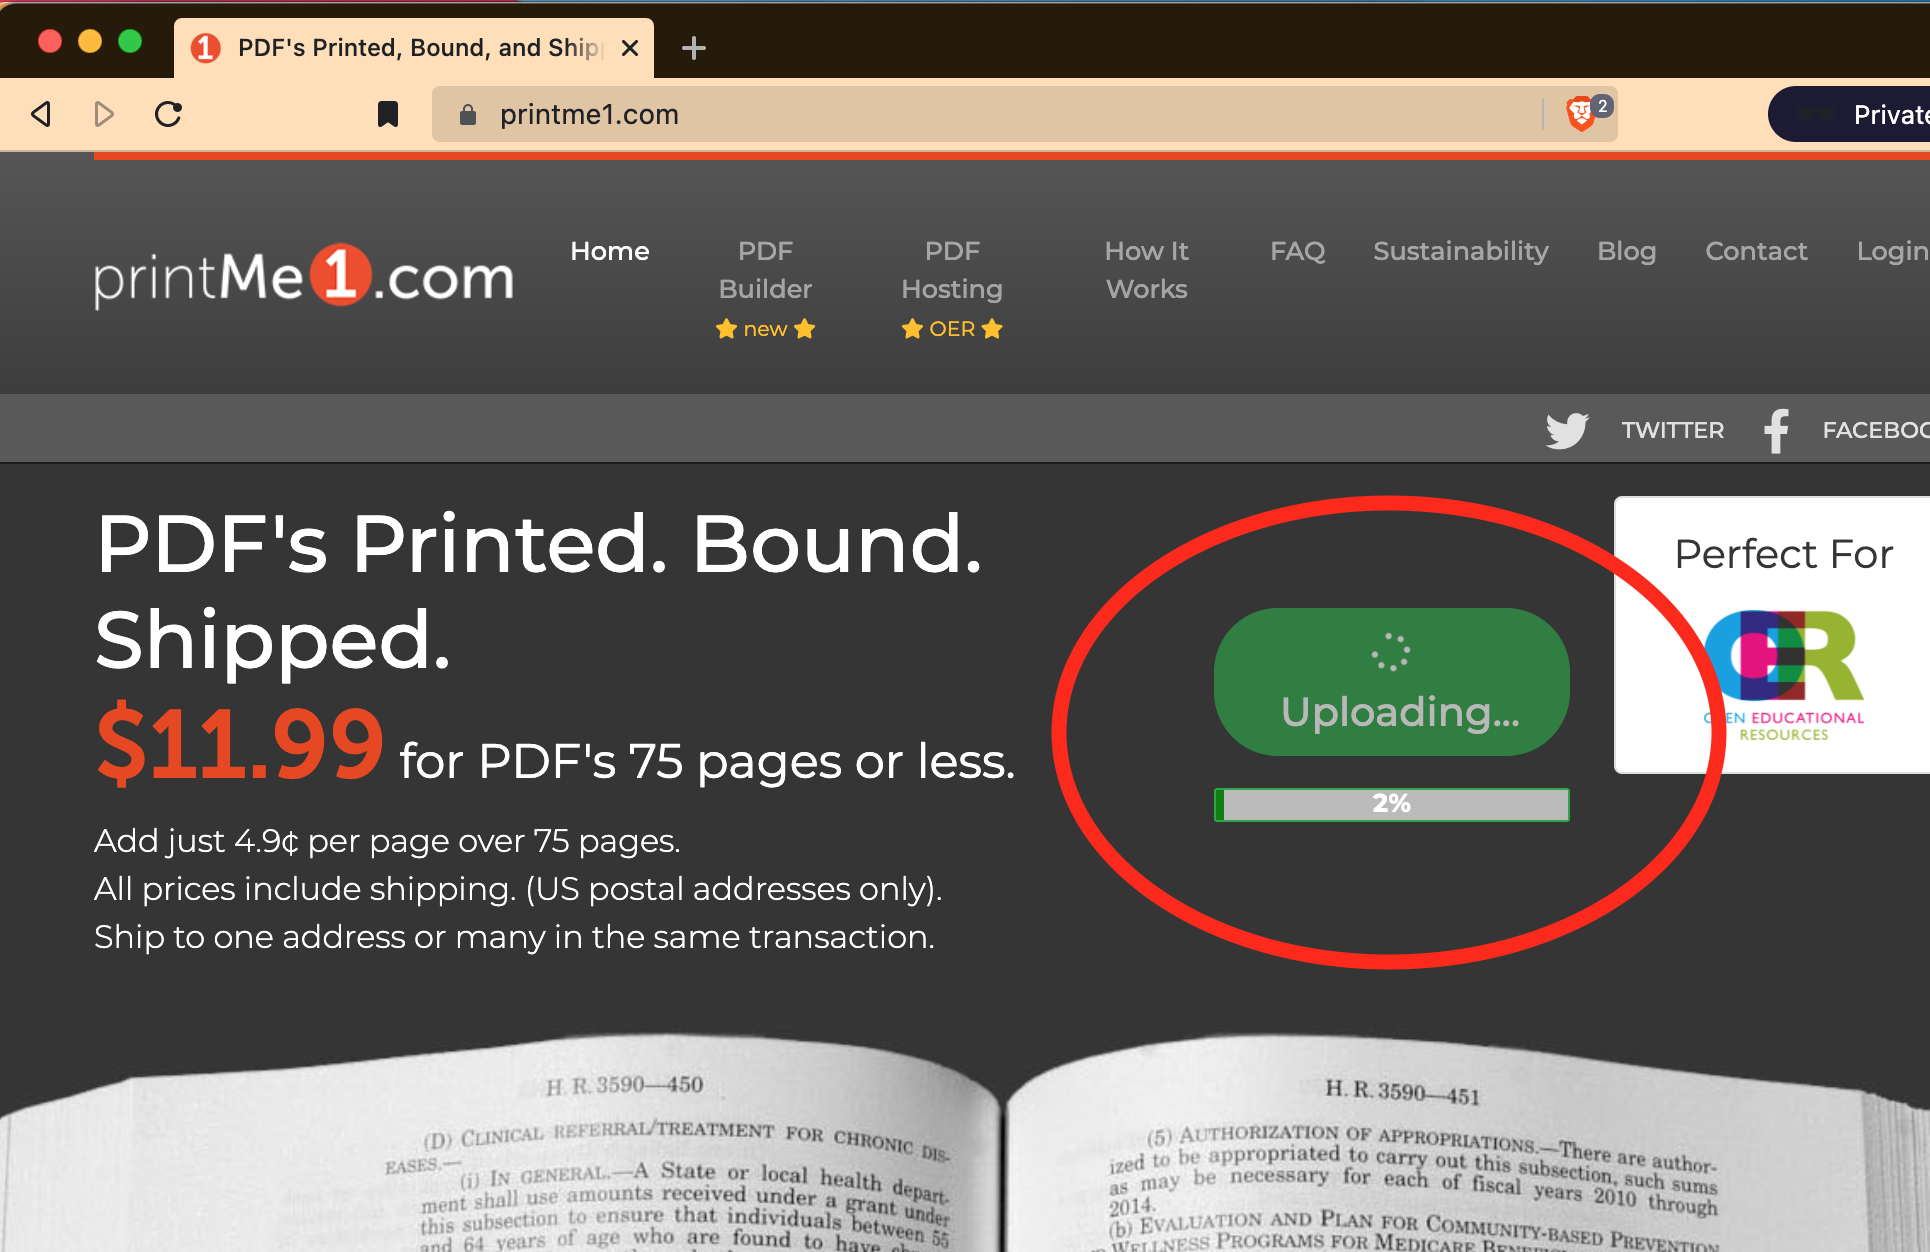
The selected PDF's are uploaded. A progress bar indicates the activity.
Step 2: Set Printing, Binding, and Copies Details
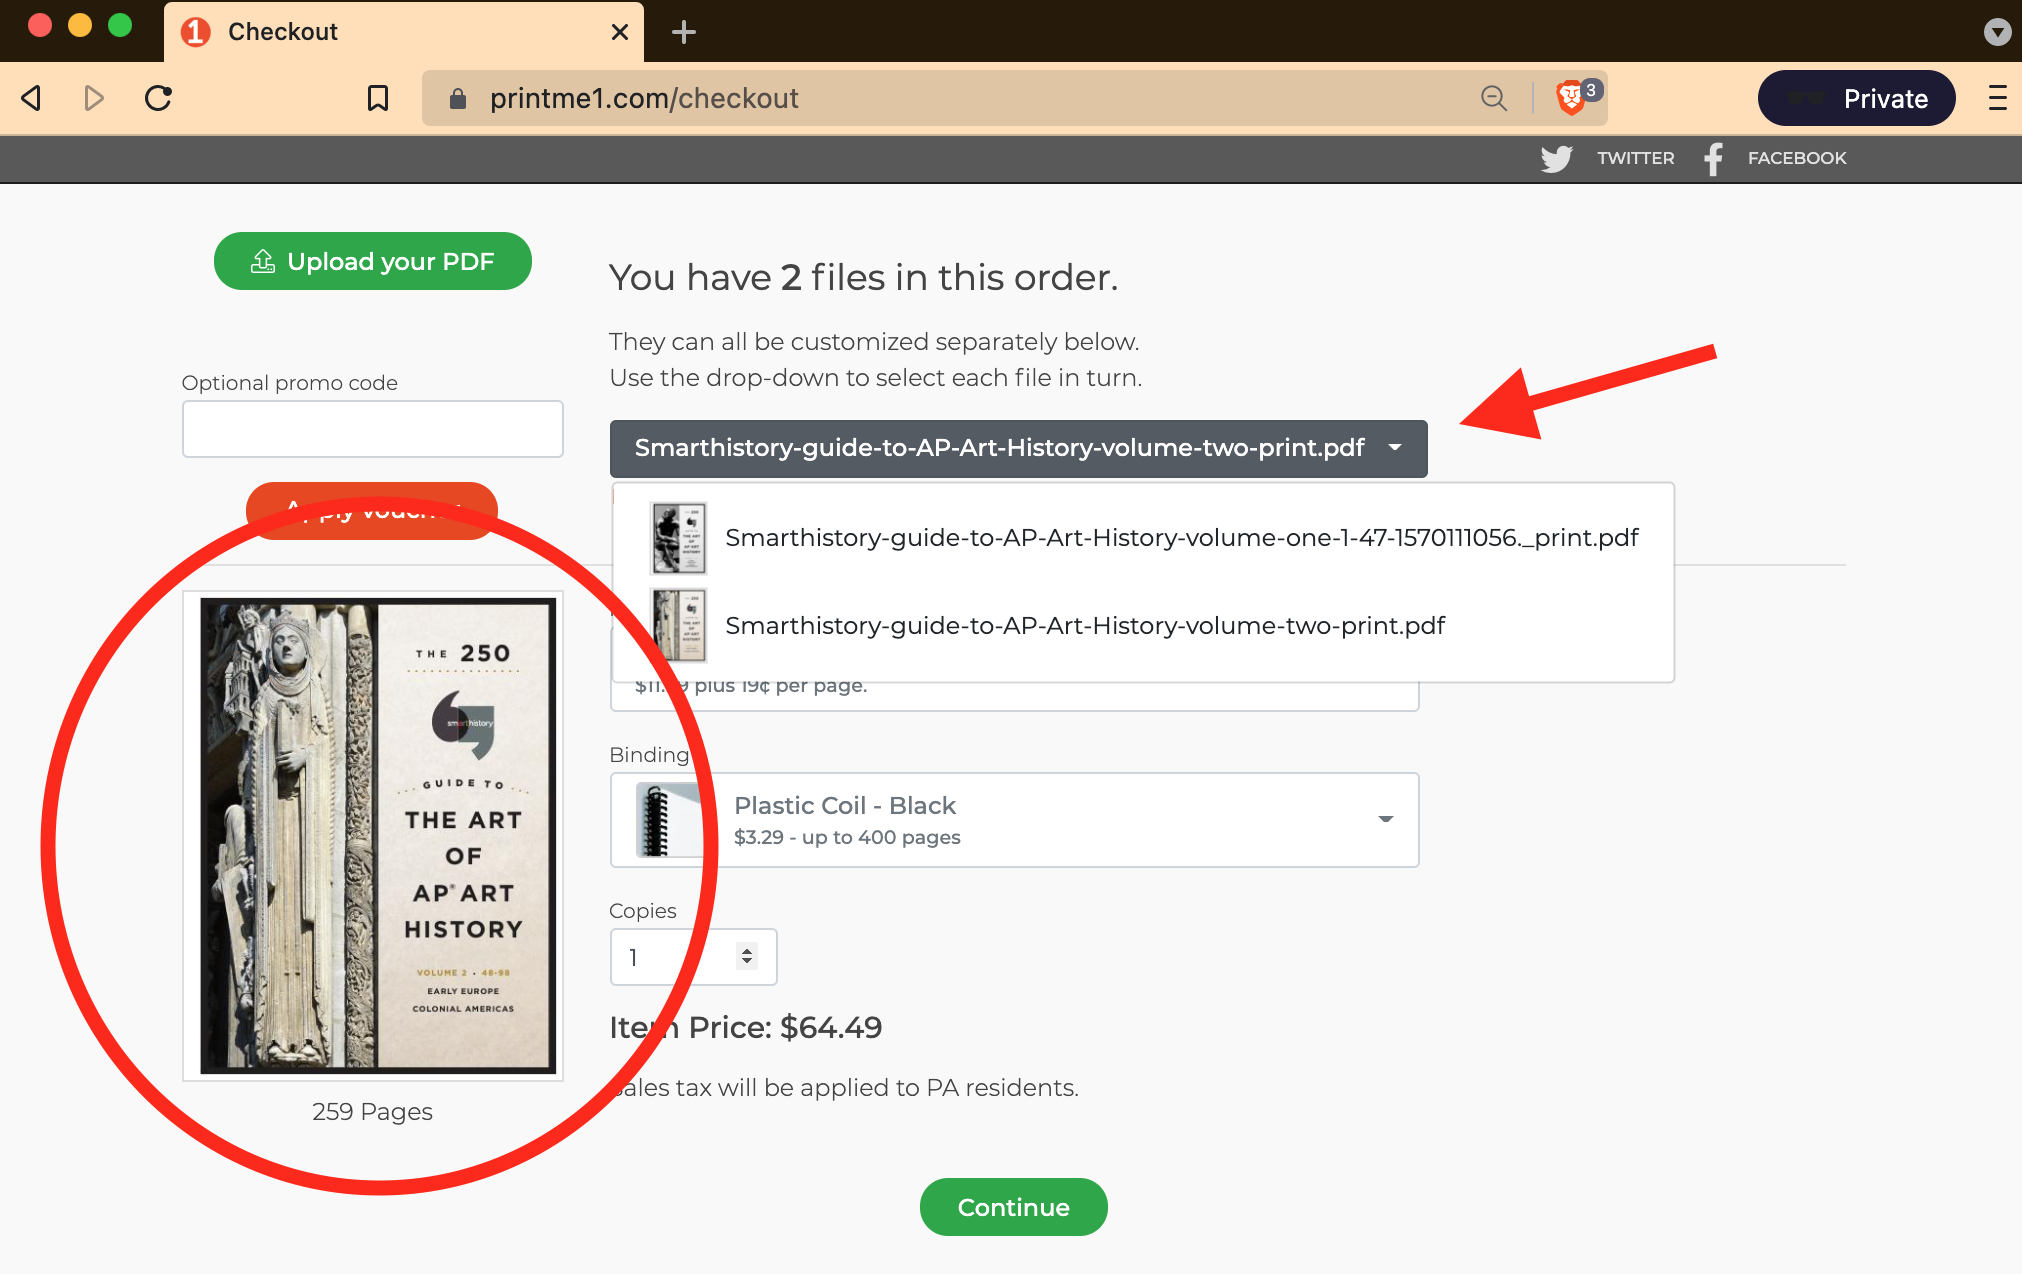
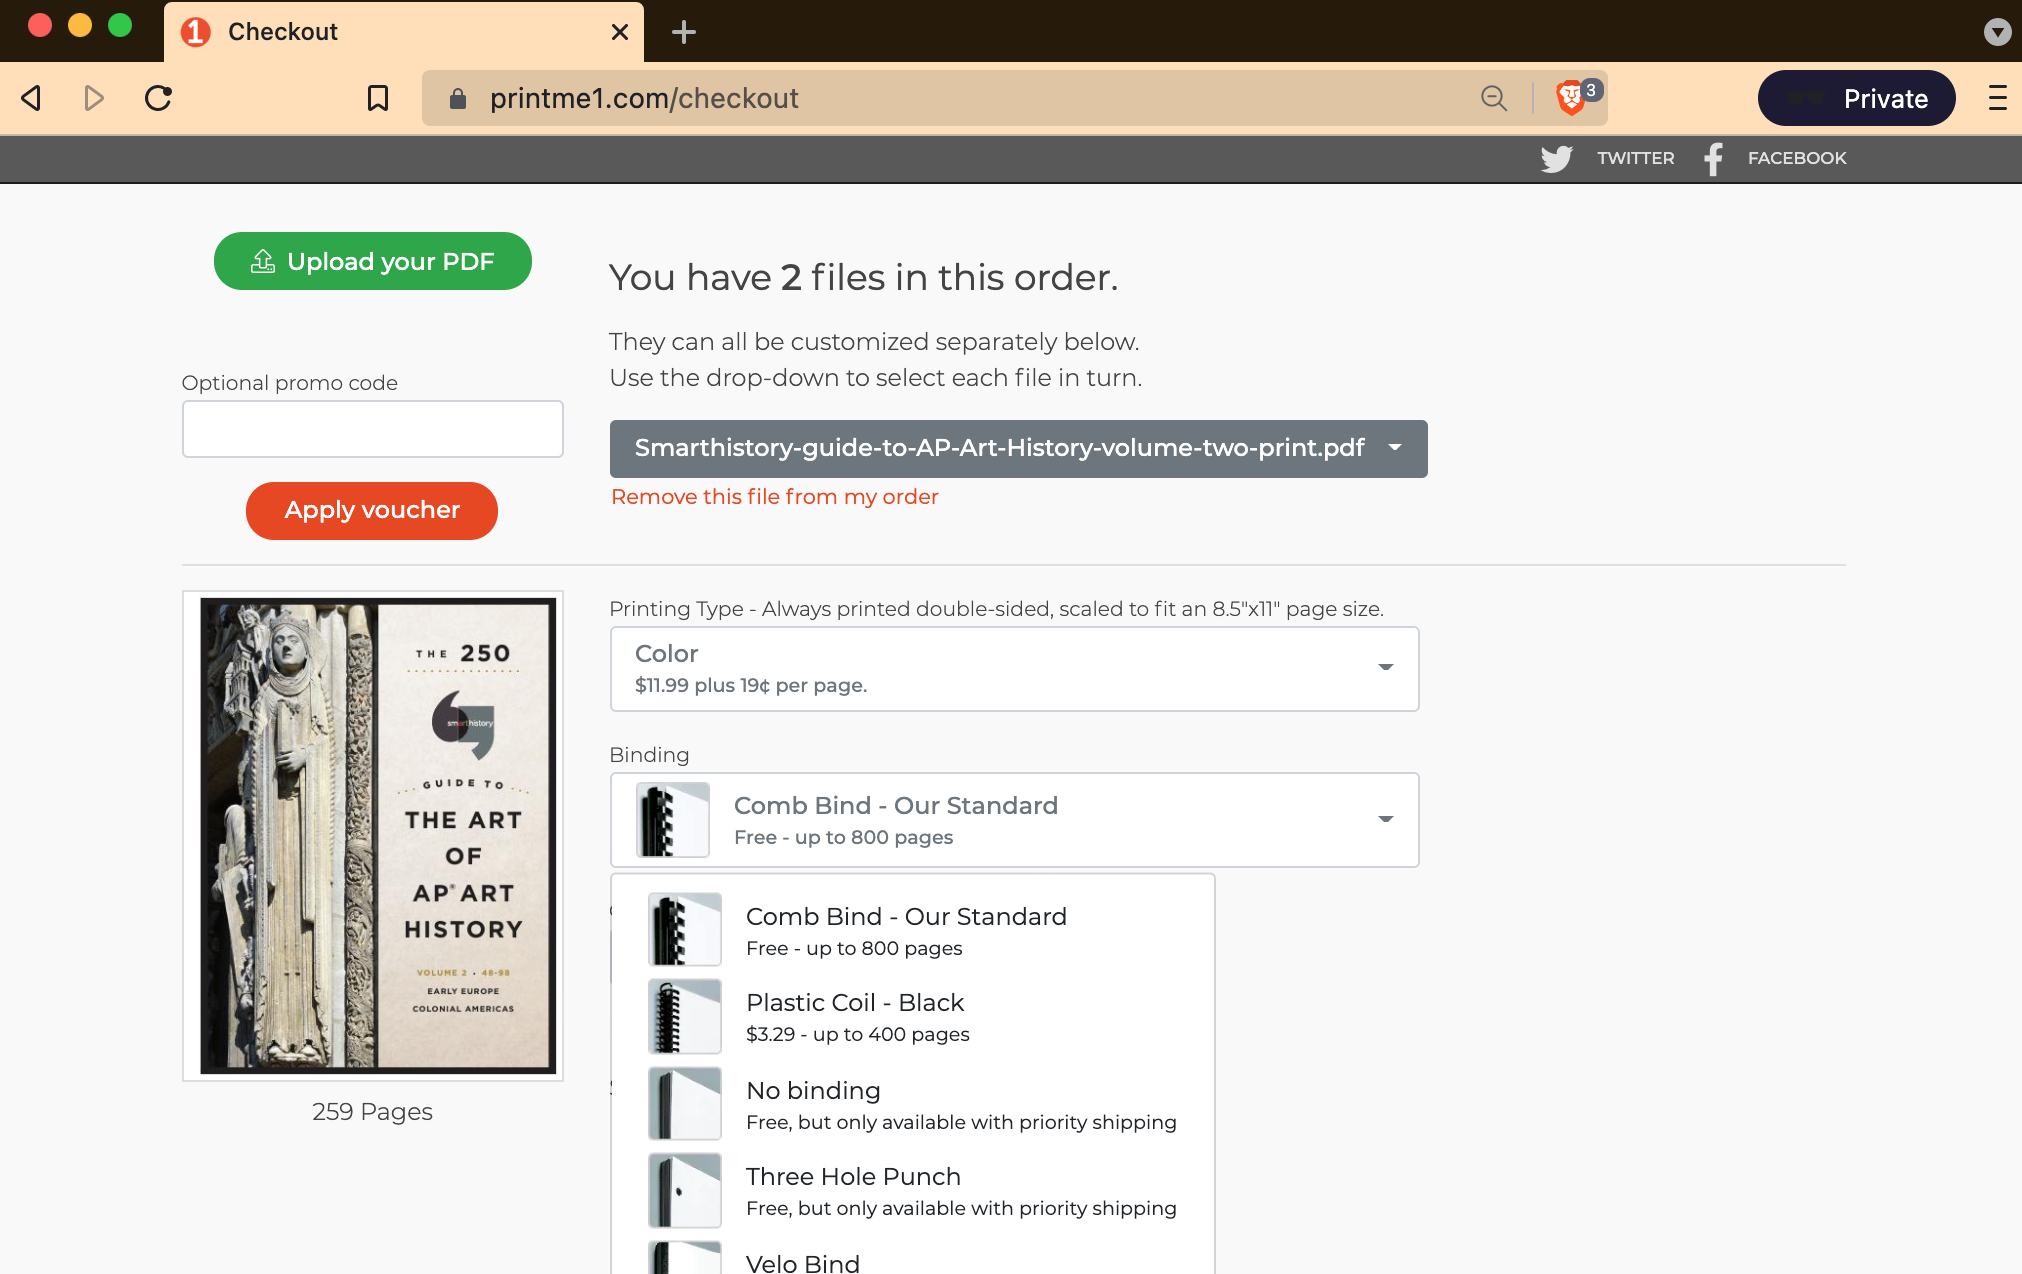
Once all of the PDF's are uploaded, the site advances to checkout details. On this page, the printing and binding details are input.
If you are uploading multiple PDF's, these details need to be selected for each PDF.
When multiple PDF's are uploaded, the filename display is an active dropdown used to toggle between the details for each PDF that was uploaded. The details appear for the filename selected in the dropdown.
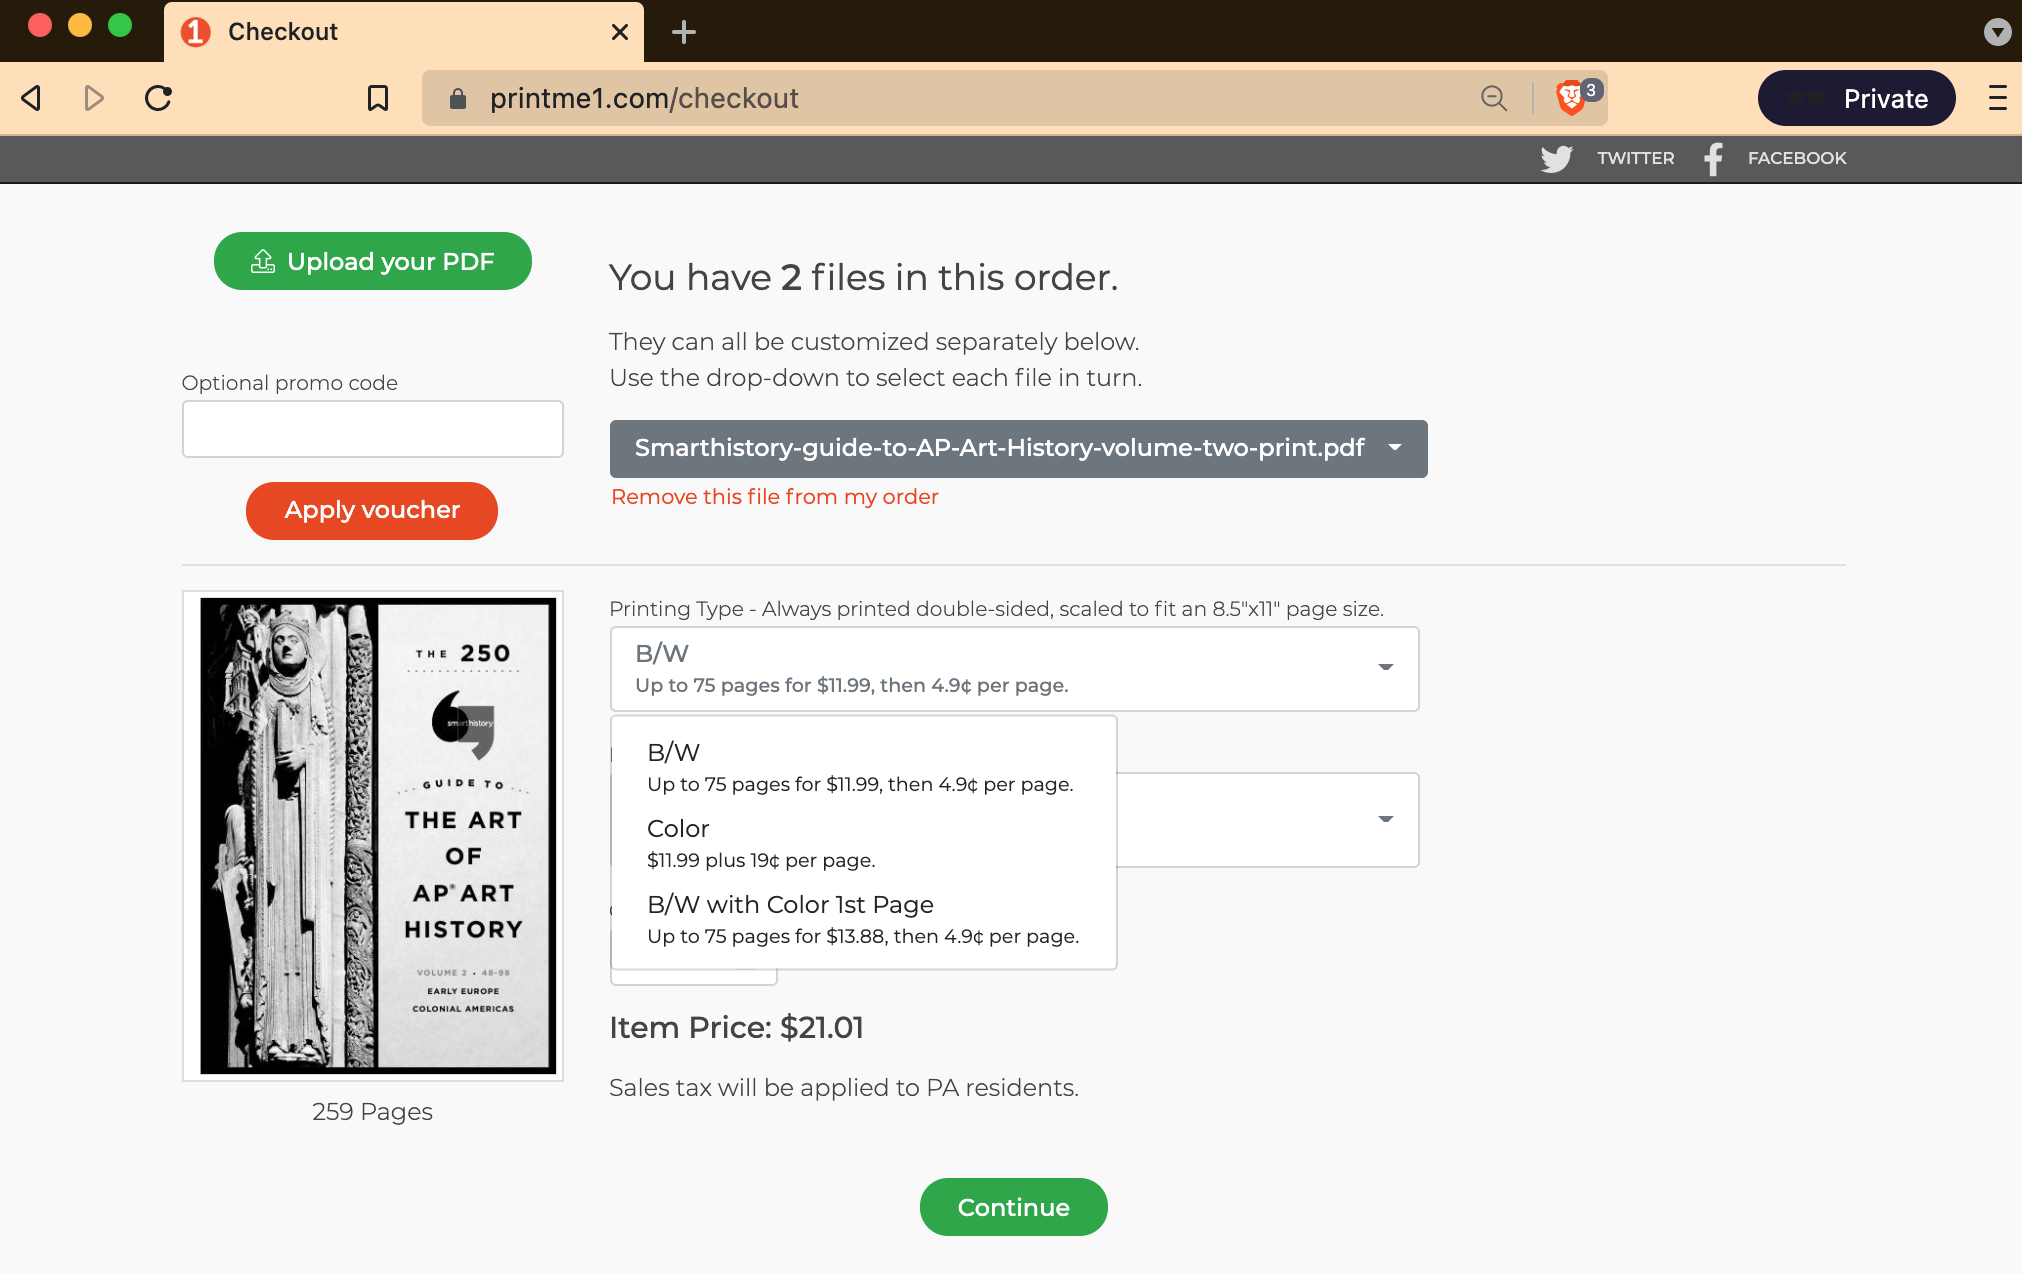
Set the Printing Type
This selection indicates the type of printing for the PDF.
Set the Binding Type
This selection indicates the type of binding for the PDF.
Copies
It's recommended to set this to 1 (default).
If Column B on the CSV spreadsheet is populated with a quantity for each recipient, the spreadsheet quantity will overwrite any setting here in "Copies".
If Column B is blank for any recipient on the CSV file, the quantity in this "Copies" field will be used.
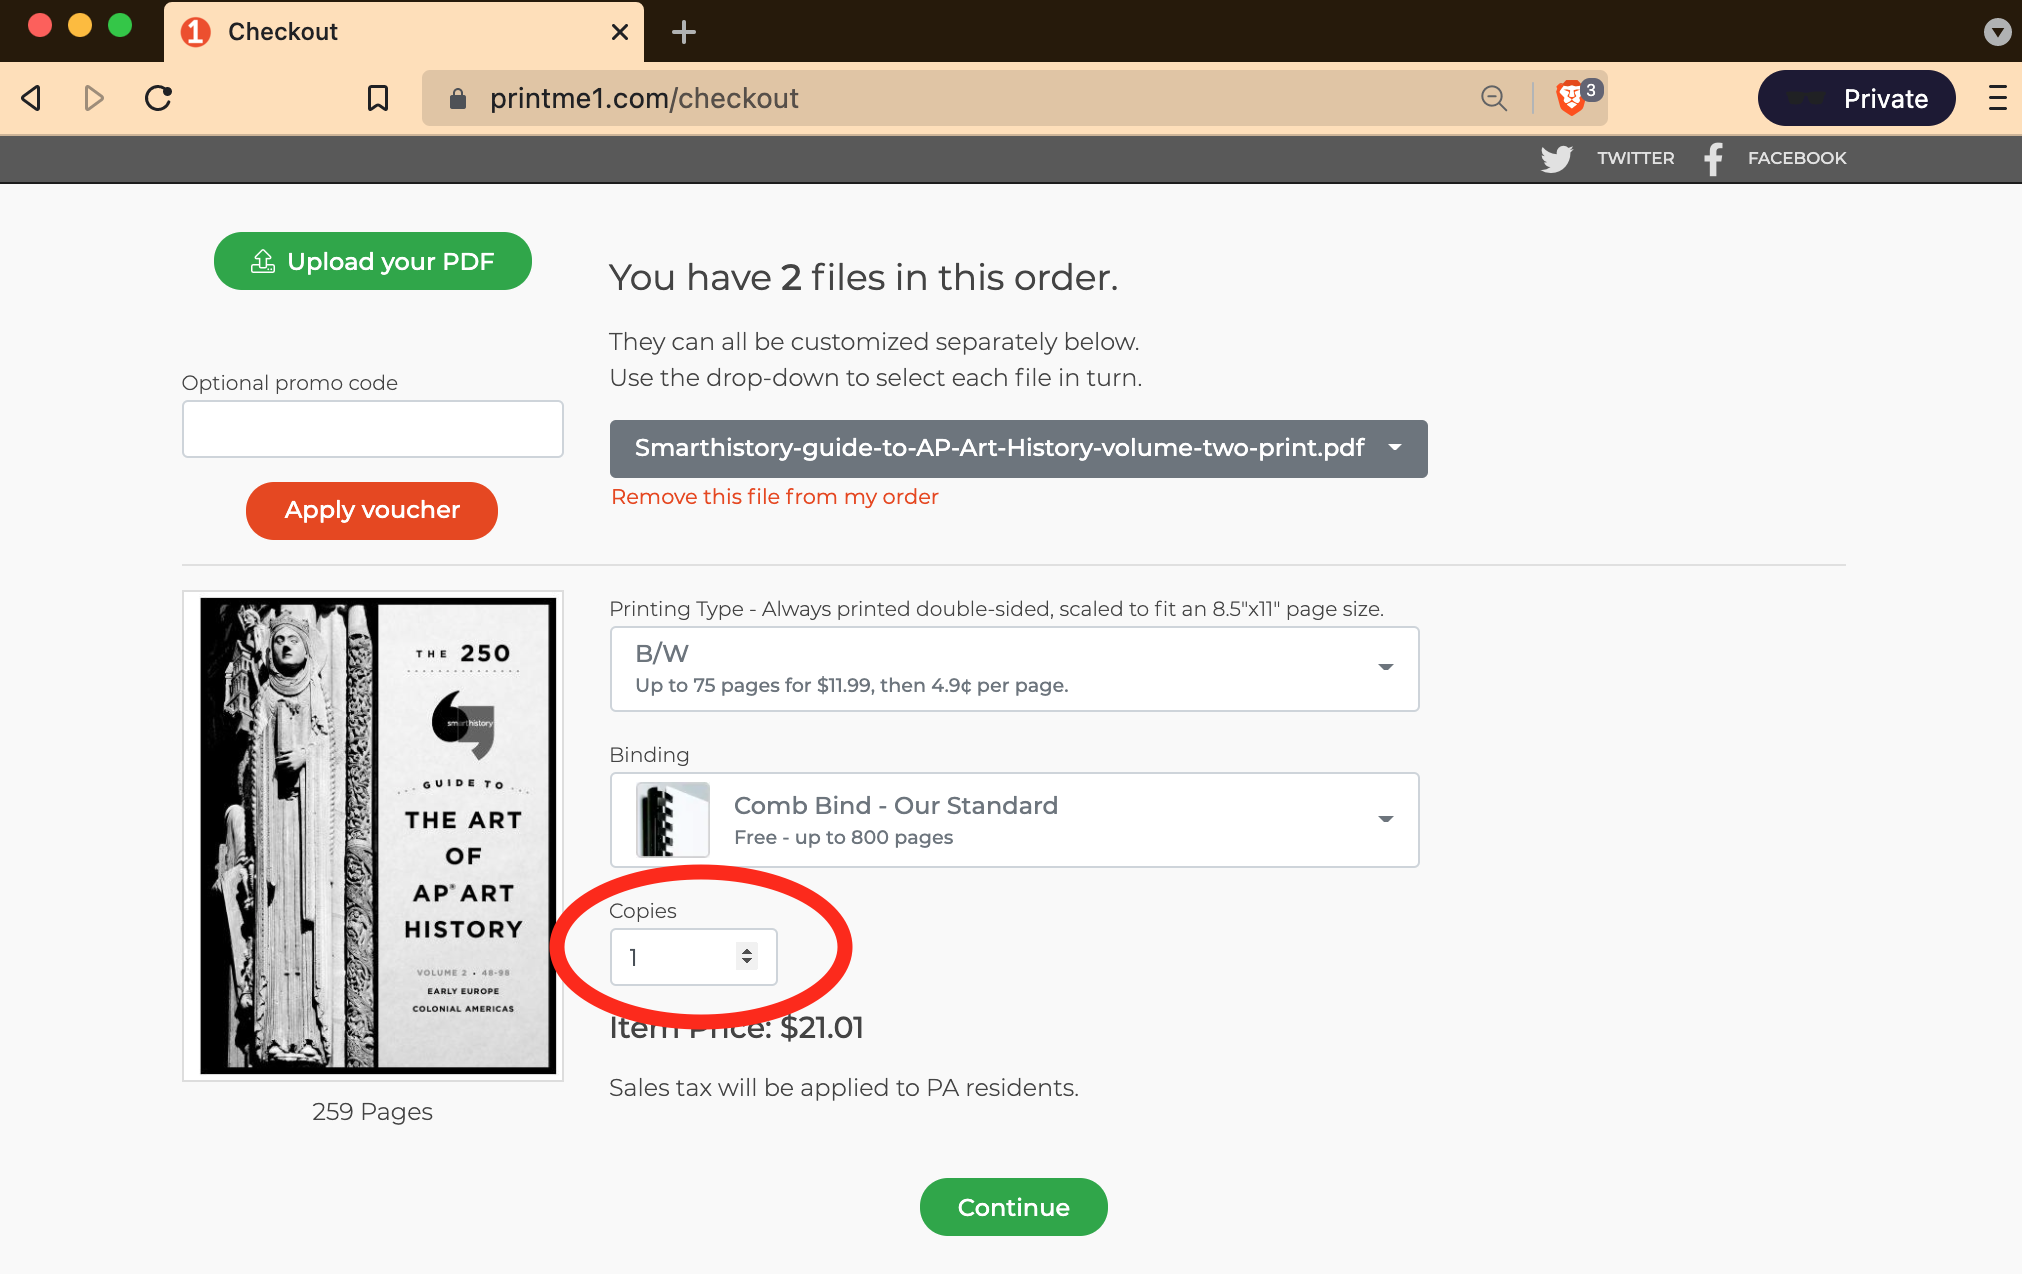
If you have a situation where each recipient is receiving more than 1 print of the selected PDF, and if you leave Column B blank in the CSV, then the value in the "Copies" field will be the default. Change the "Copies" field to the quantity each recipient will receive for this print.
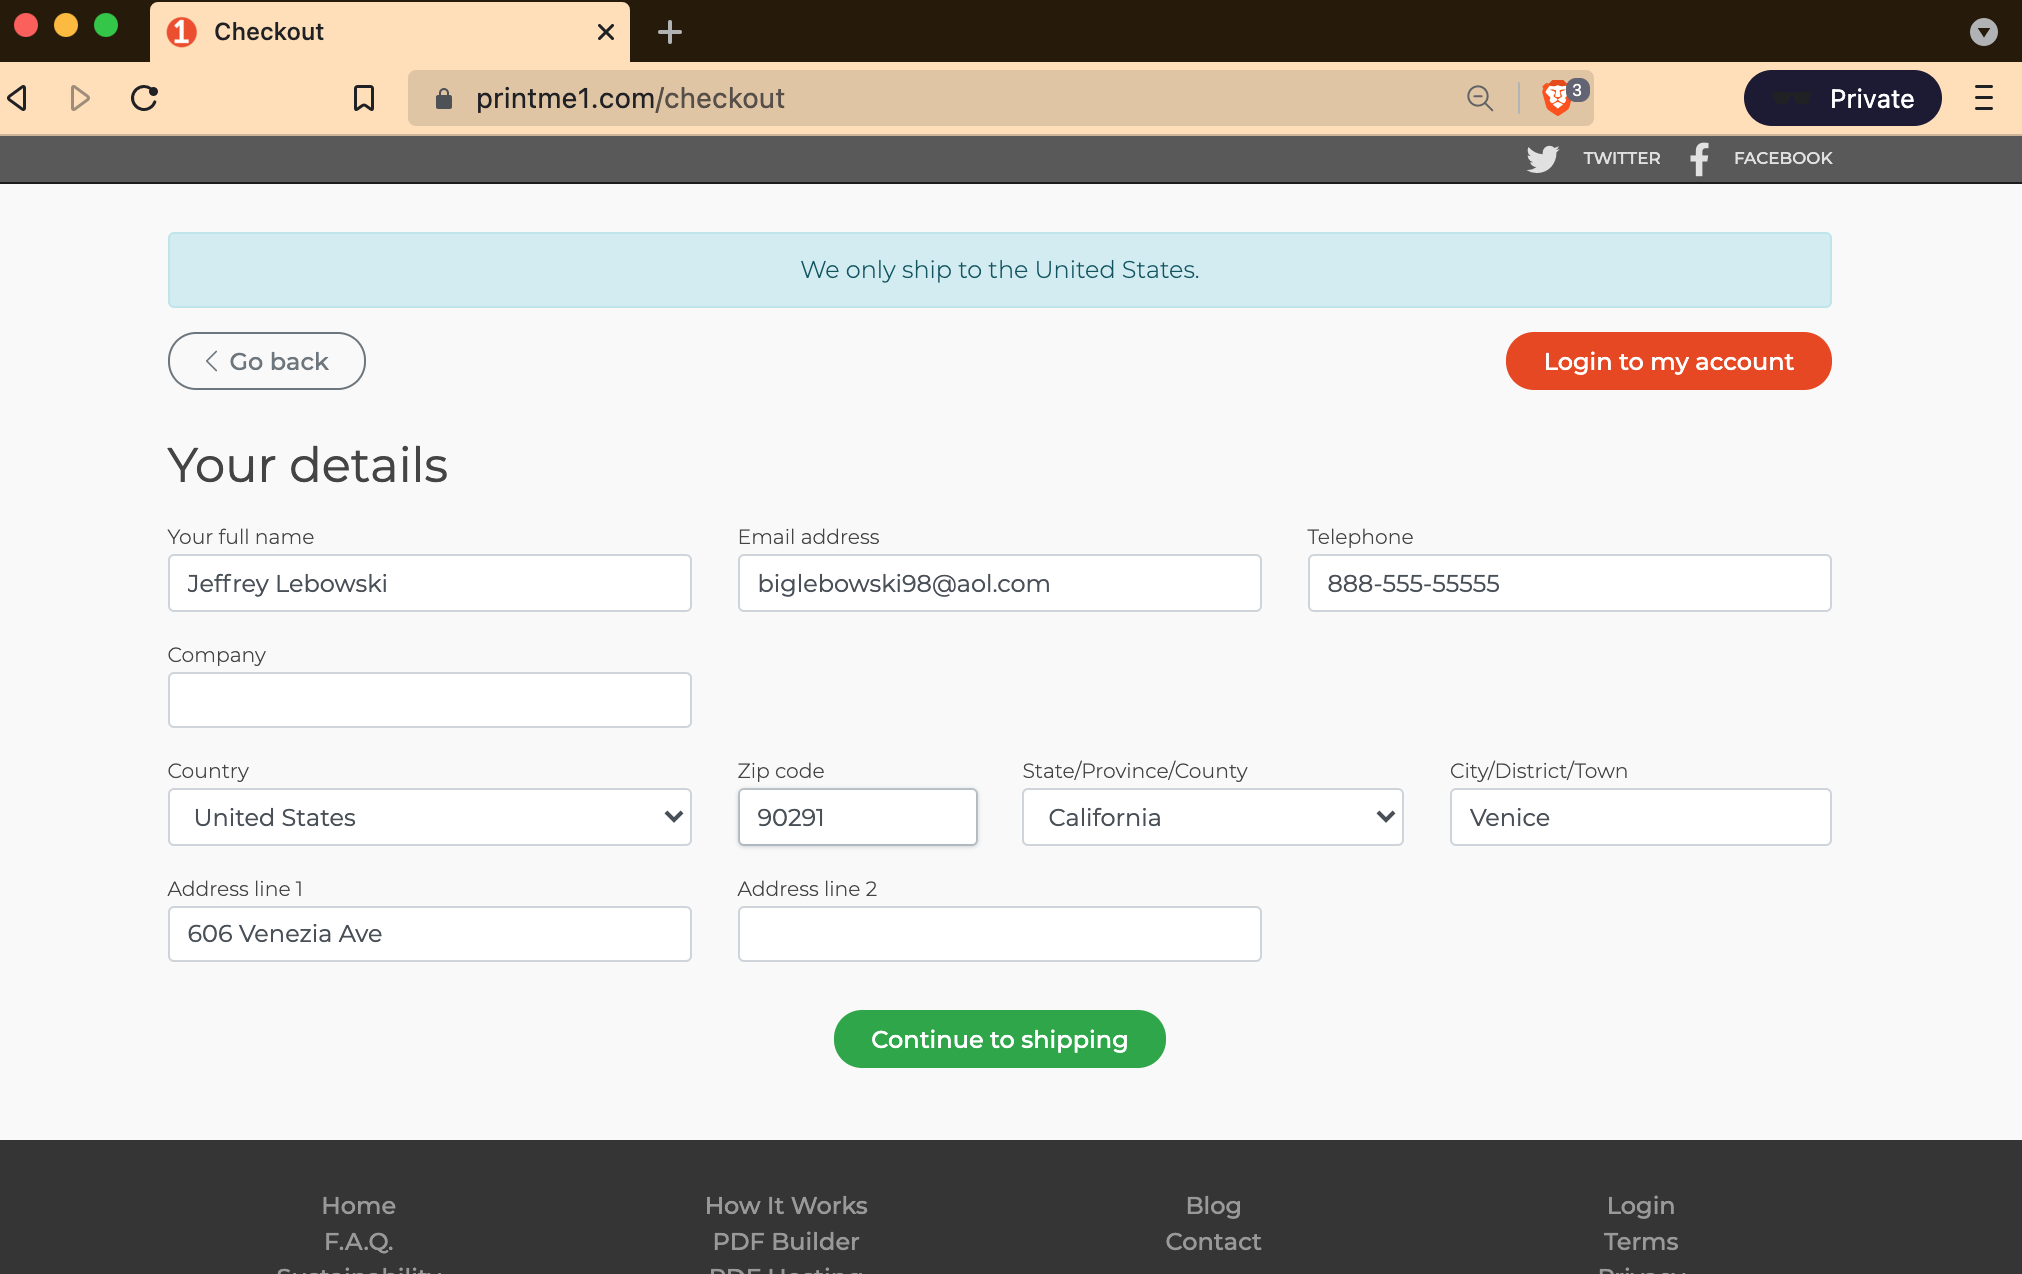
Step 3: Billing Information
This page collects the billing address for the purchaser. This should be the address for the credit card that will be used to pay for the order. Paypal does not work with the One to Many™ feature.
Click "Continue to shipping" to advance.
Step 4: Shipping
Click the "Manage Multiple Addresses (CSV)" button.
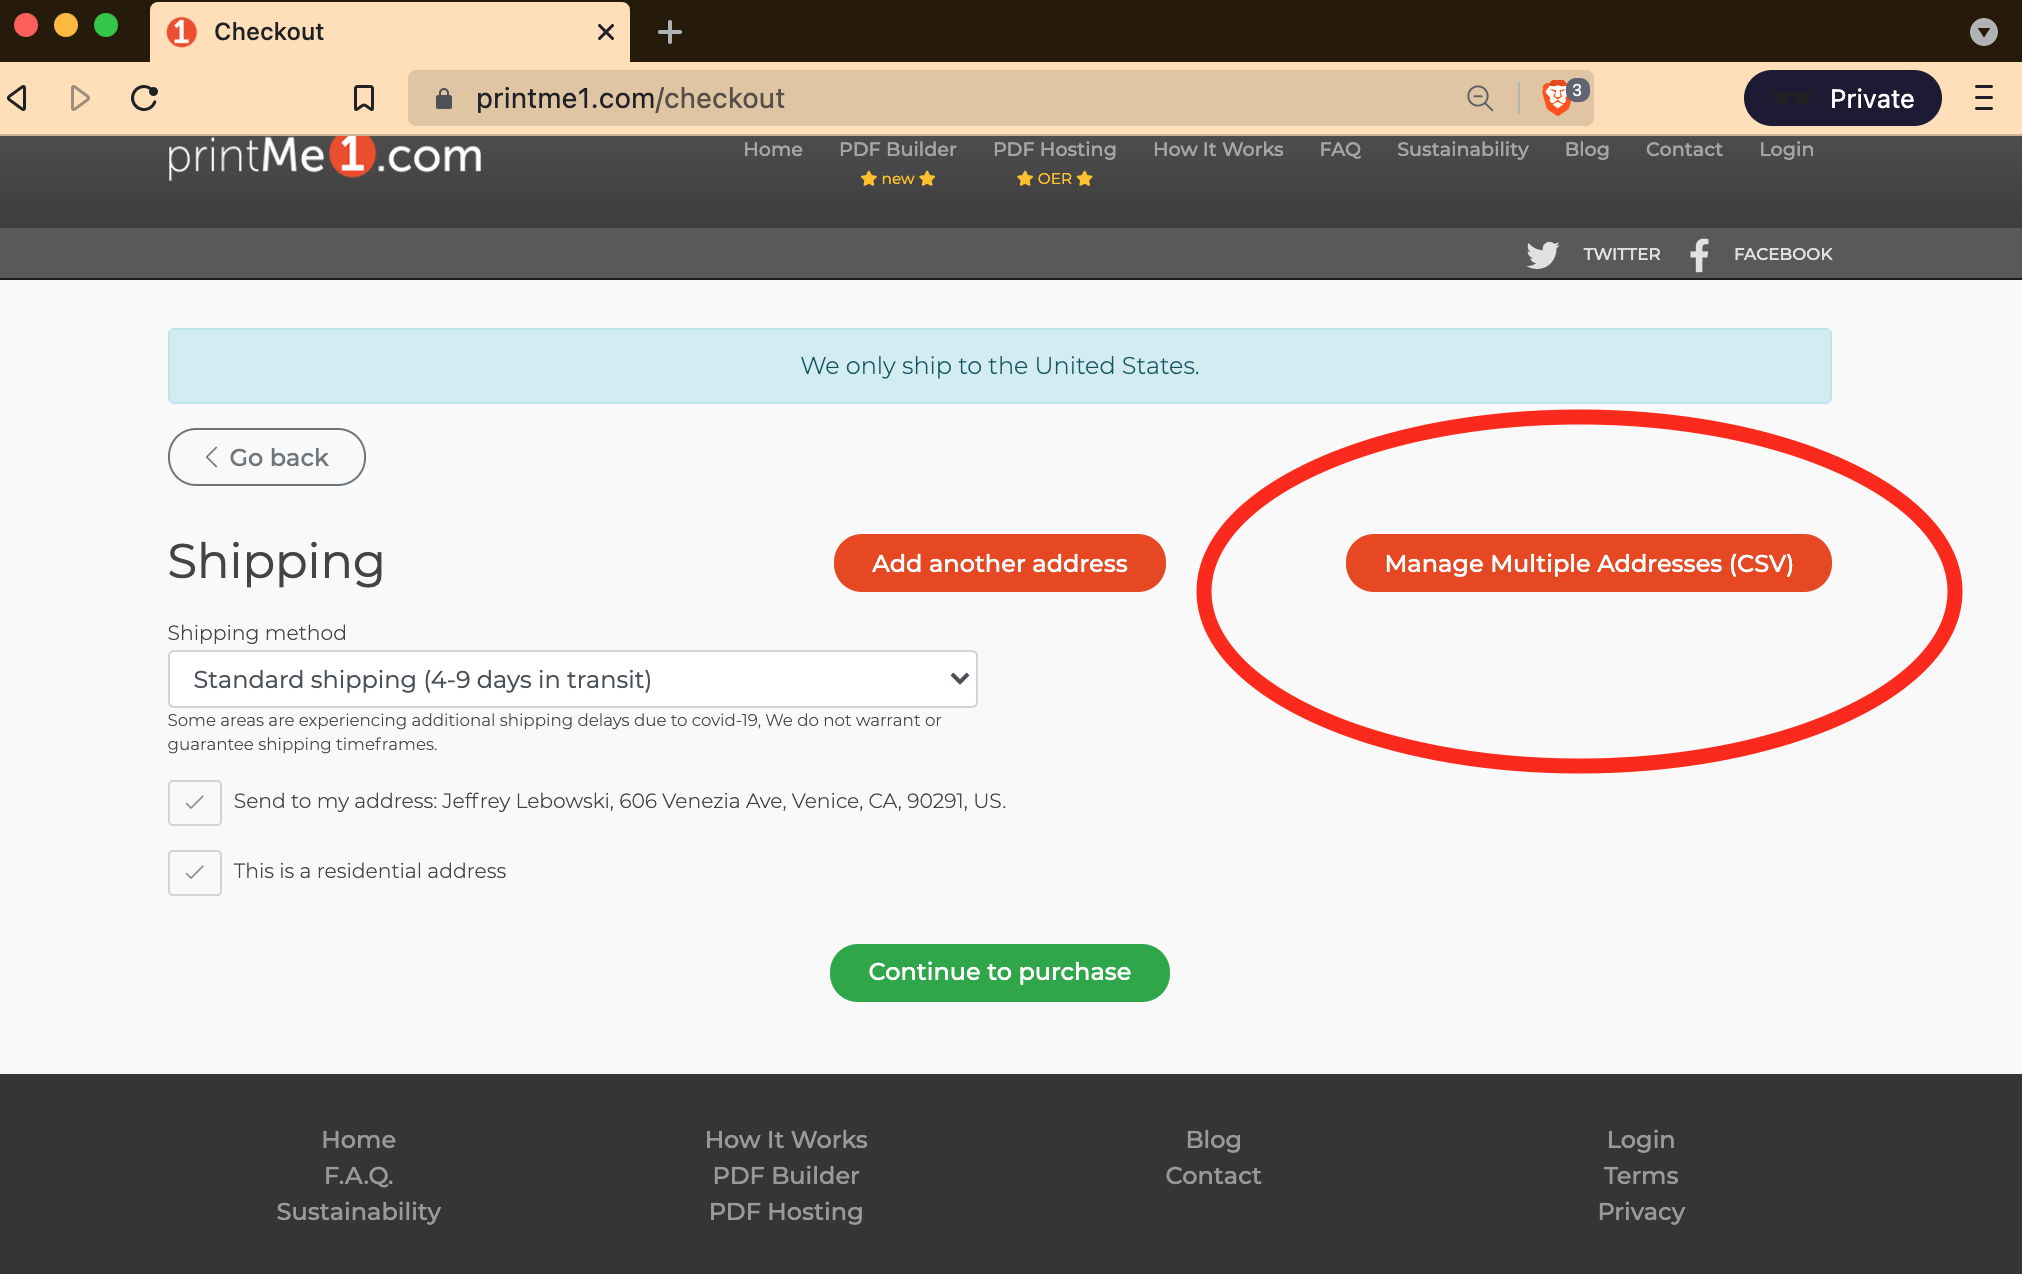
This opens up a page that displays the CSV instructions (same as in the Spreadsheet Formatting section above) and an upload button to use to attach your CSV file.
Click the "Choose File" button and attach your CSV.
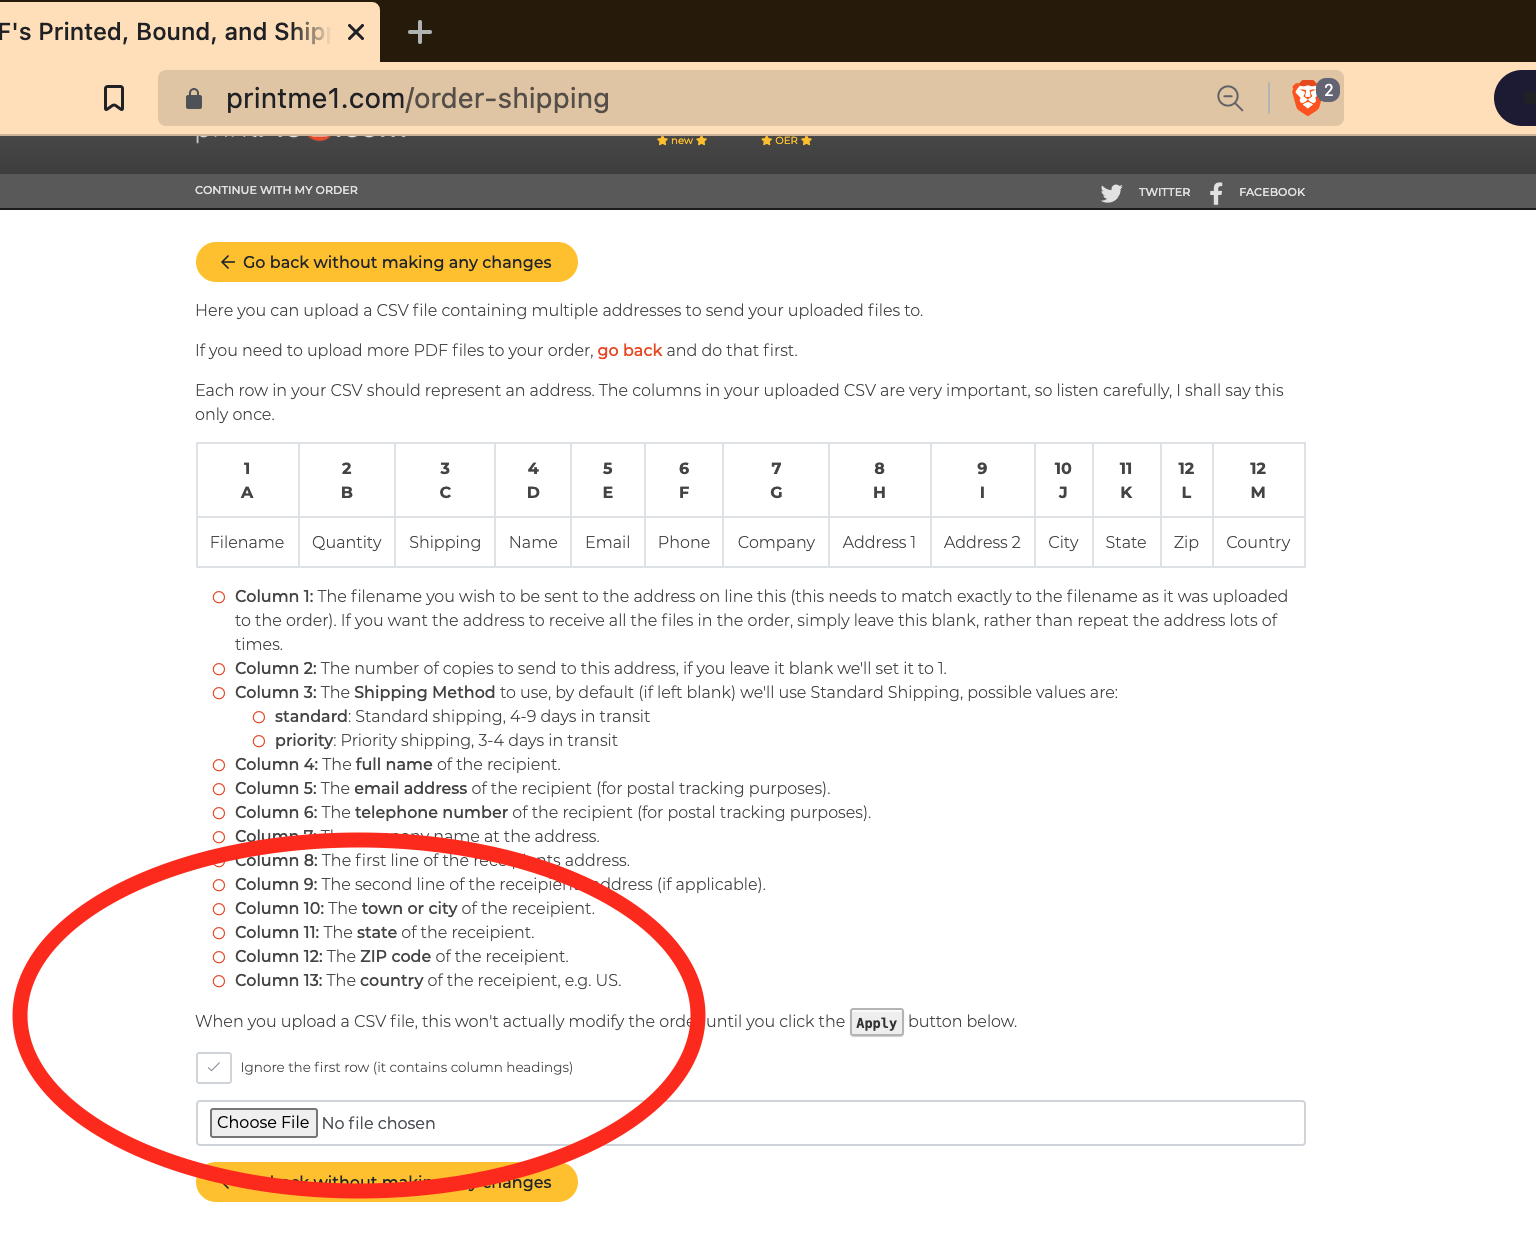
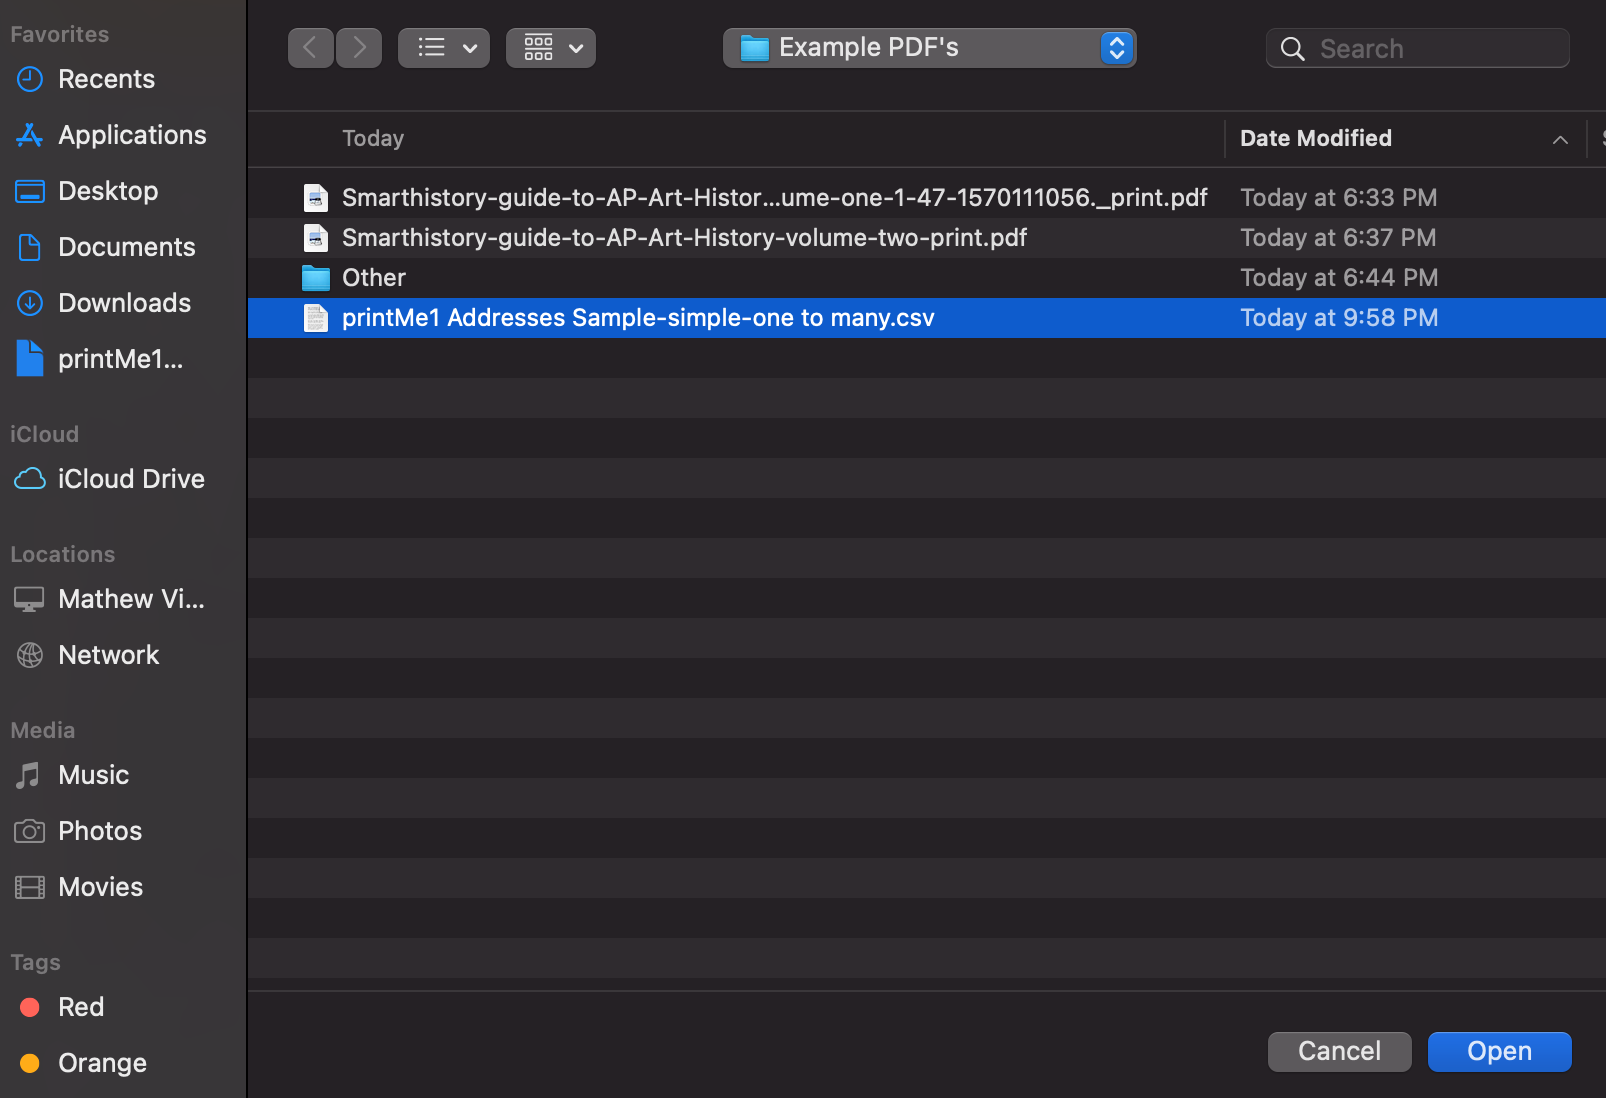
Find and select your CSV file and click "Done" to upload it.
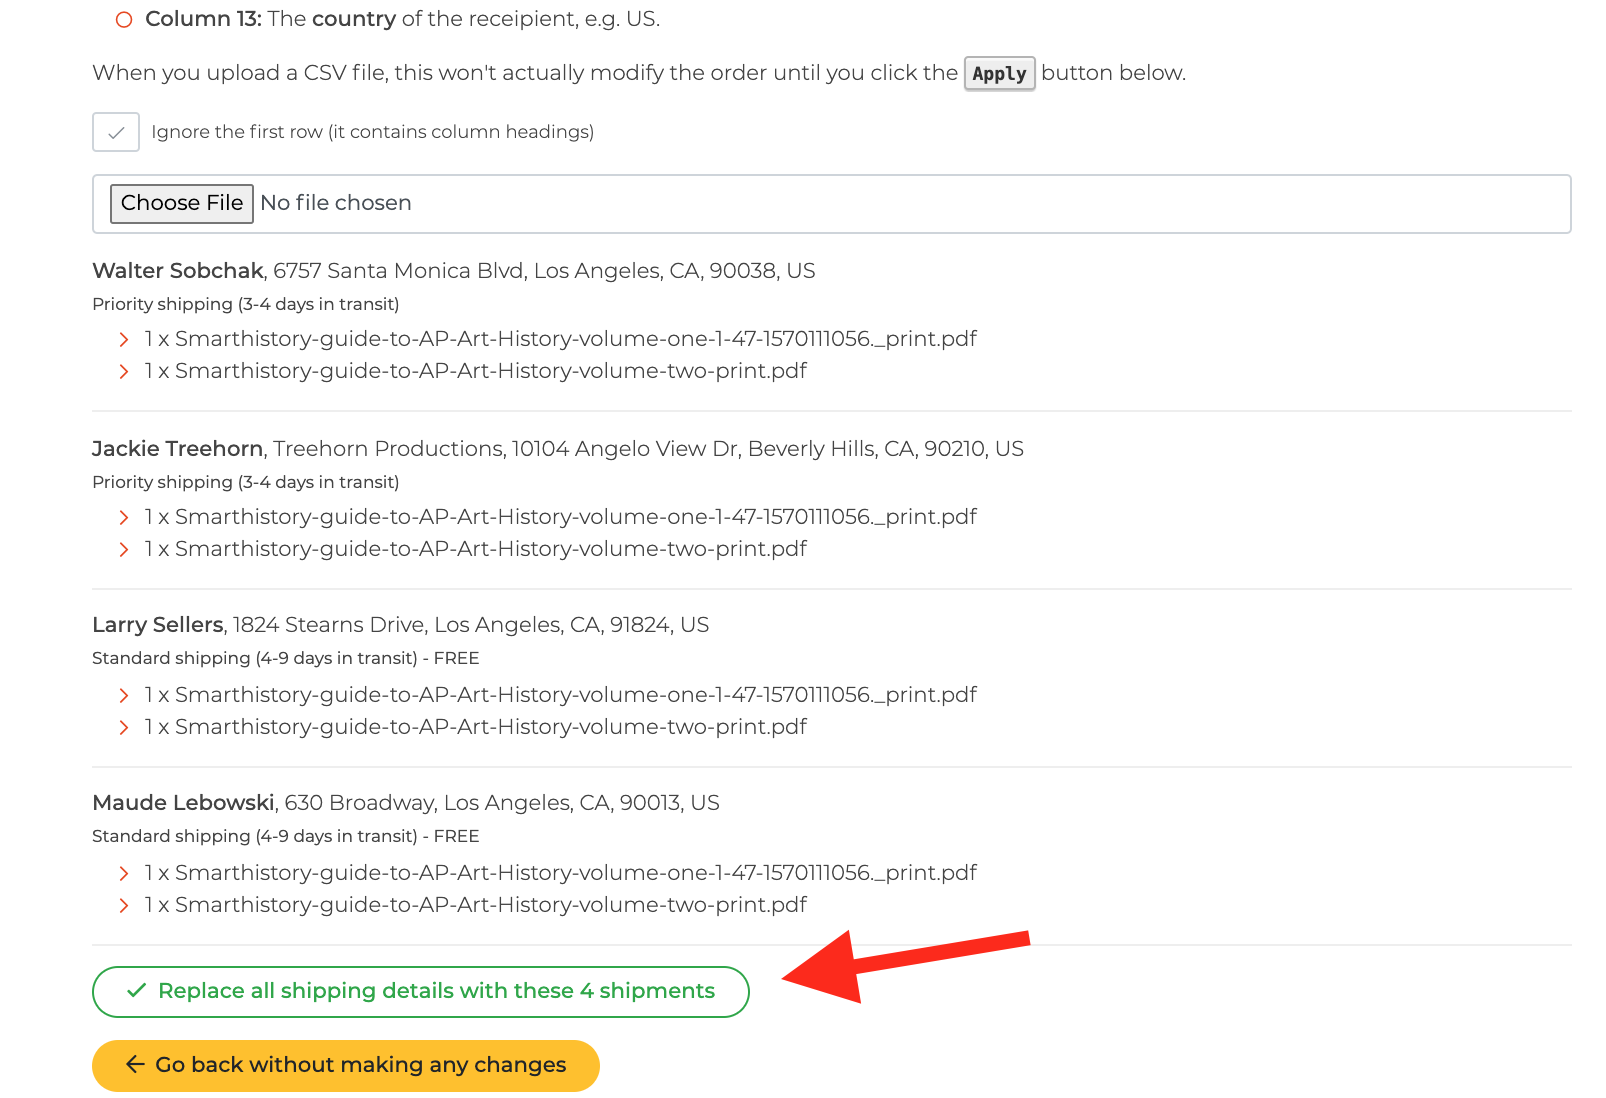
This will upload, and automatically display the Recipients, address, and the prints they will receive. In our example, we had 4 recipients, each receiving a set of 2 different prints. 2 recipients had priority shipping and 2 had standard shipping listed on the CSV. These were all collected by the site from the CSV and displayed below.
If there is an error in the CSV or something needs to be changed, you can make changes to your CSV at this time and re-upload the CSV.
If everything is correct, click the green button to apply the CSV and return to checkout. Note: If you have a list with 100 or more addresses, this may hang for a minute while the site is calculating everything.
After clicking the green button, the CSV addresses overwrite any prior addresses and then returns you to shipping. The 1st recipient appears in the gray shipping dropdown, and their shipping details appear in the fields.
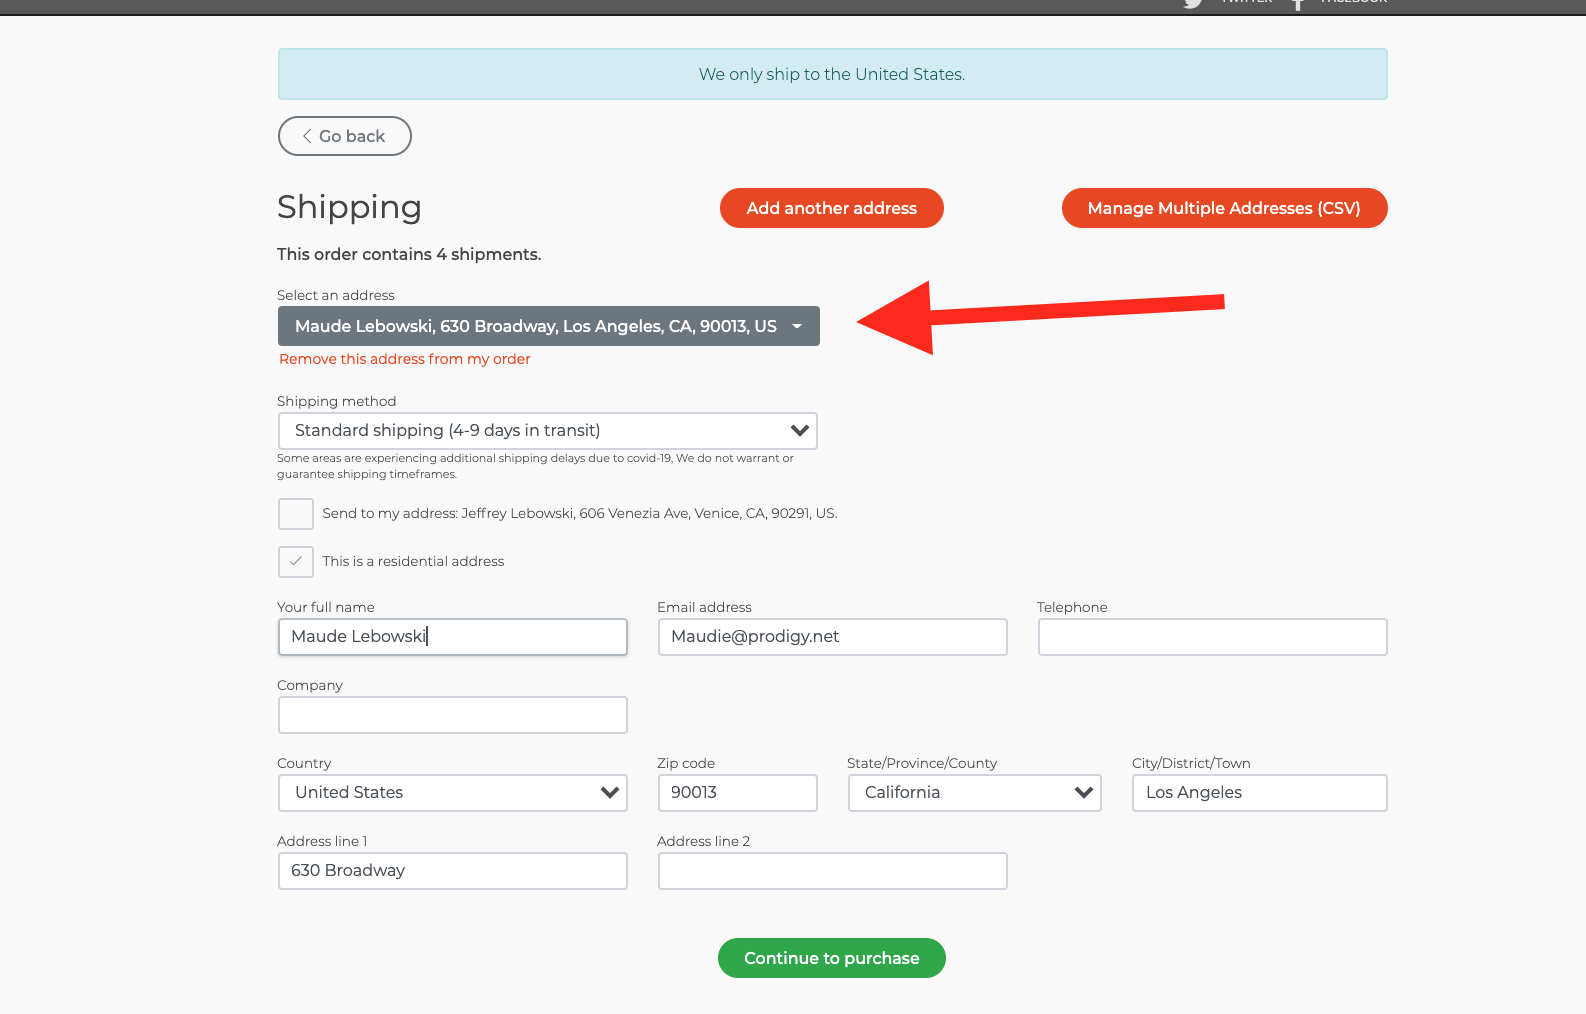
Changes to any recipient's address can be made by clicking the dropdown and toggling to the recipient you want to change.
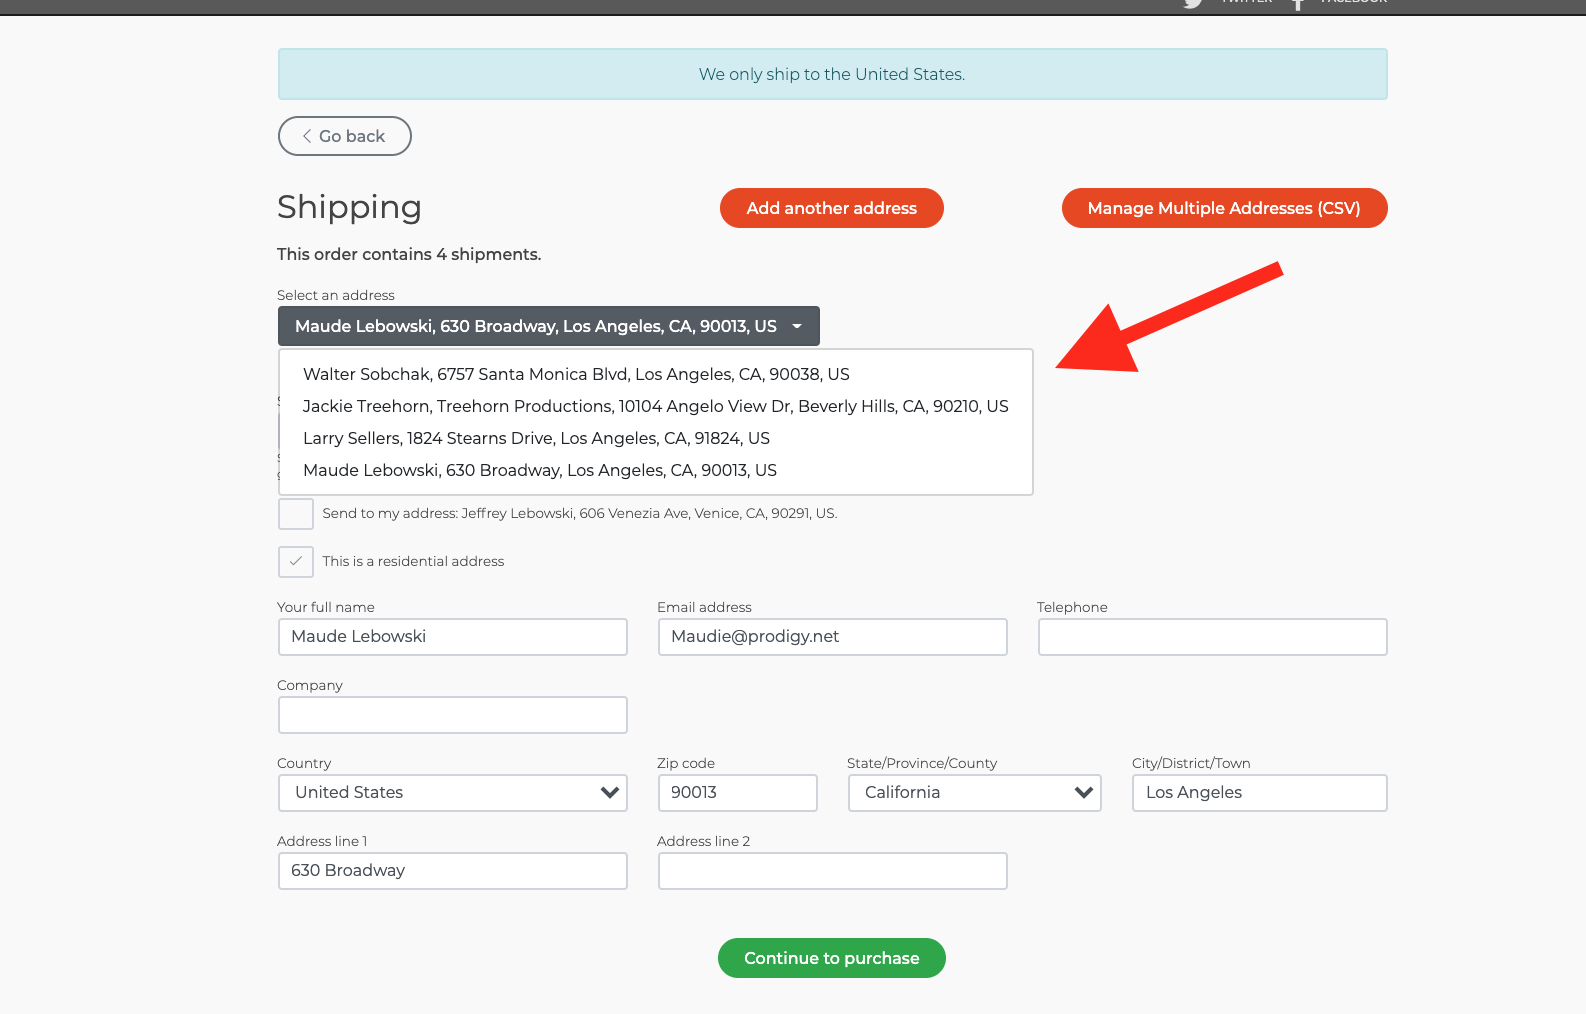
If everything in shipping looks good, congrats! You just uploaded a CSV of addresses.
Click the green "Continue to payment" button to advance.
Pro Tips:
If you need to upload more PDF files to your order, go back and do that before uploading the CSV.
When you upload a CSV file, it won't actually modify the order until you click the green button to Apply the CSV.
If something isn't right with the CSV, you can correct the CSV and re-upload it.
Step 5: Payment
On this page, the order details are presented with the total.
The order is listed per shipment, so you see the shipping method, recipient & address, then the prints that address will receive. There is a quantity button with each filename that can be used to change a quantity for any recipient before paying.
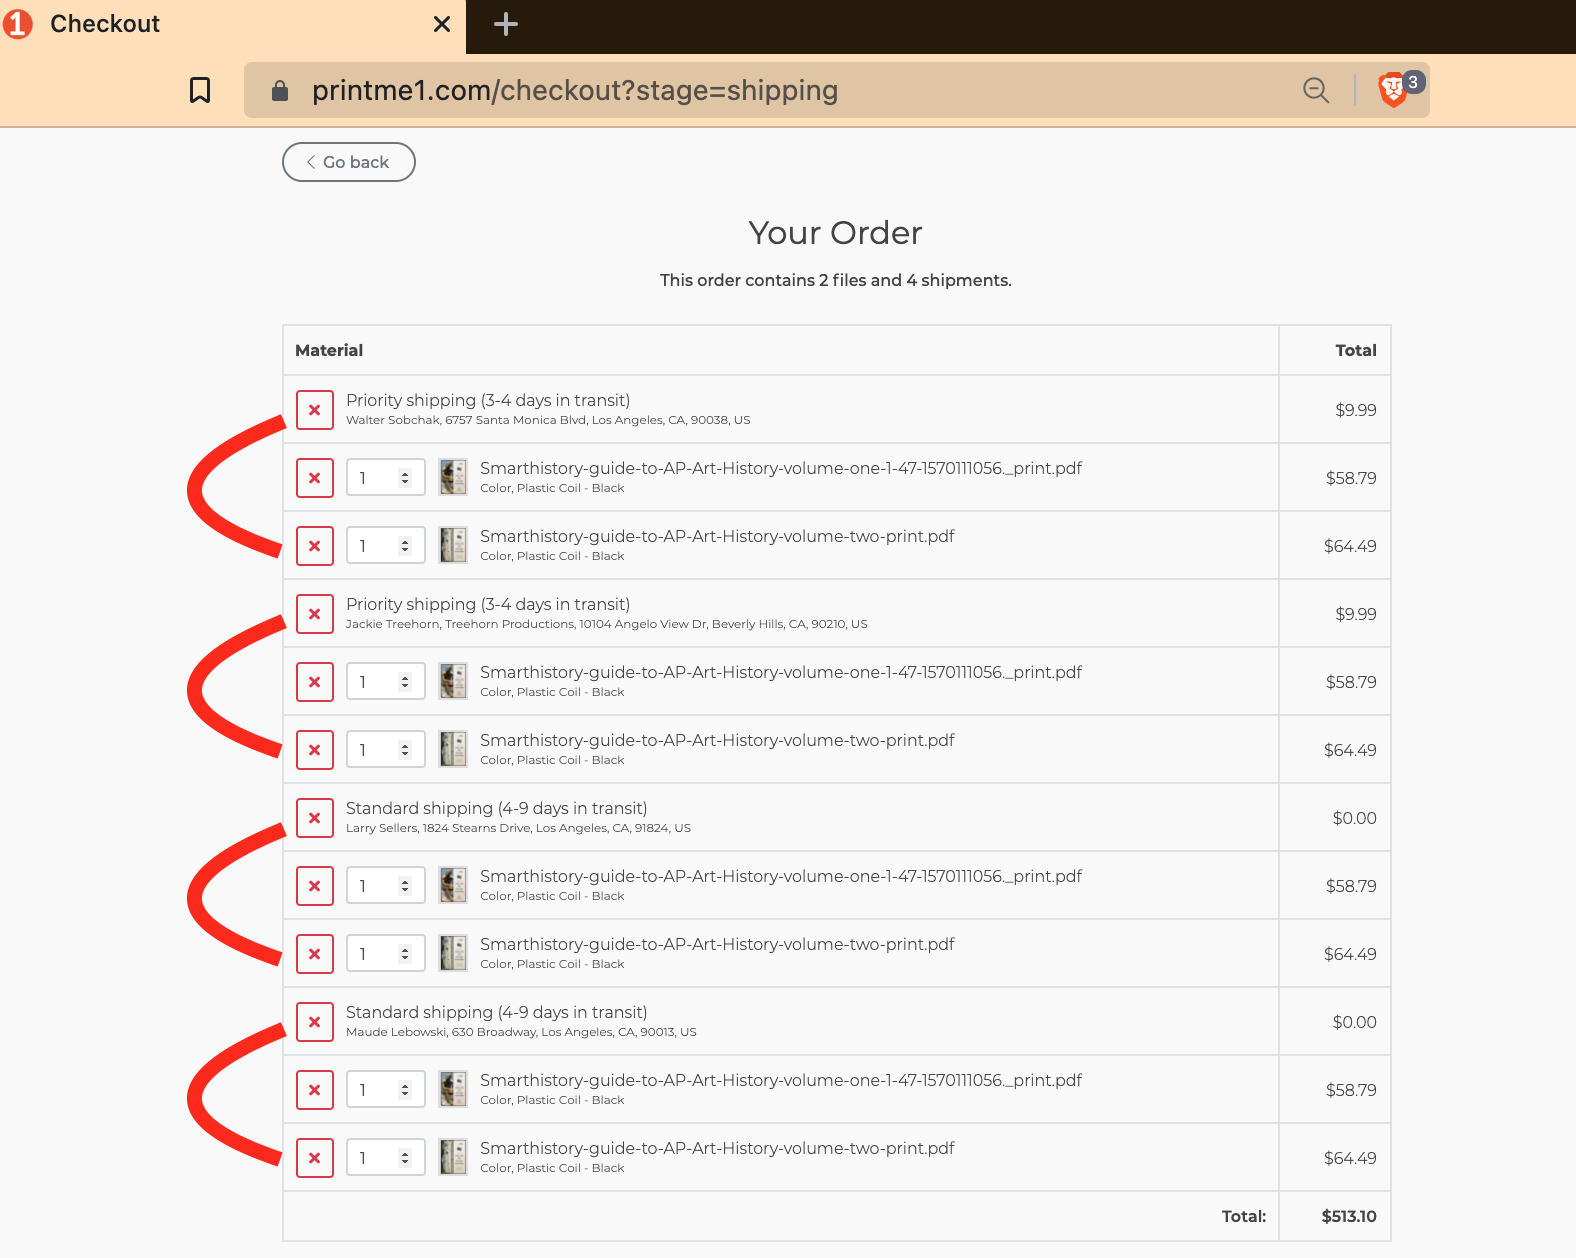
This list may be very long. Scroll to review each item. When you reach the end of the list, the payment button will be found. Input your credit card or purchasing card number, and click "Complete Order".
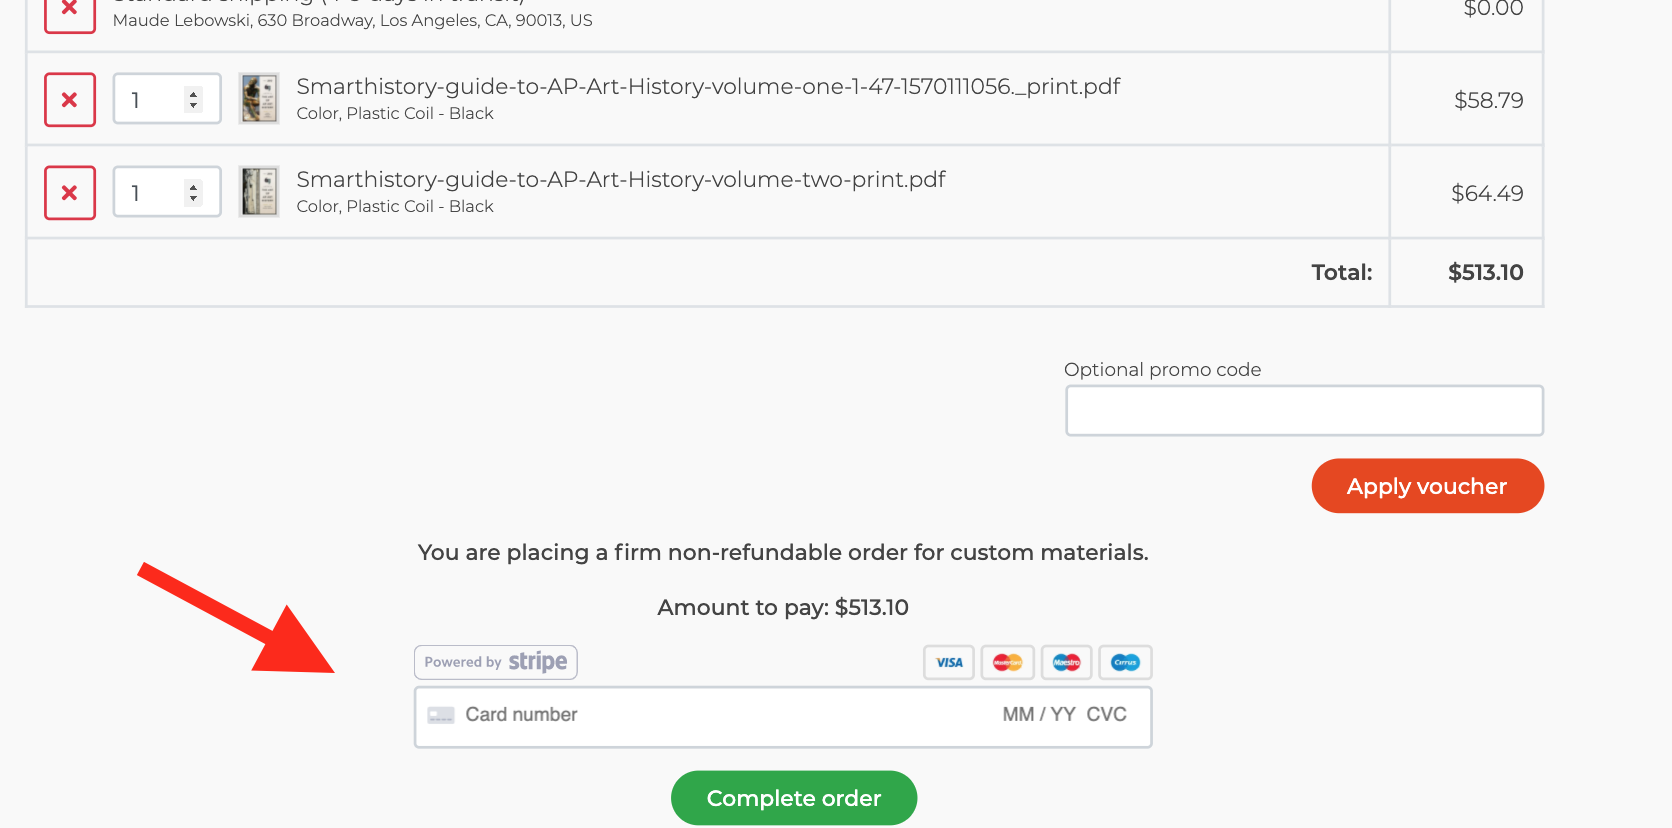
Done! You just processed a print order to many addresses using a CSV.
Tips and Troubleshooting
Resuming an order in progress
If you started an order and close your window or otherwise are back at the home page, you can proceed to your uploaded PDF's by clicking the link "Continue with my order", found under the printMe1.com logo.

Removing PDF's from an Order
If you have uploaded multiple PDF's and want to remove some of them without starting over, here's how to do that.
Once you have more than one PDF, a dropdown menu is created at the PDF filename area to use to toggle through the PDF's. To remove a PDF, use the dropdown to select it, then click the orange link "Remove this PDF from my order".
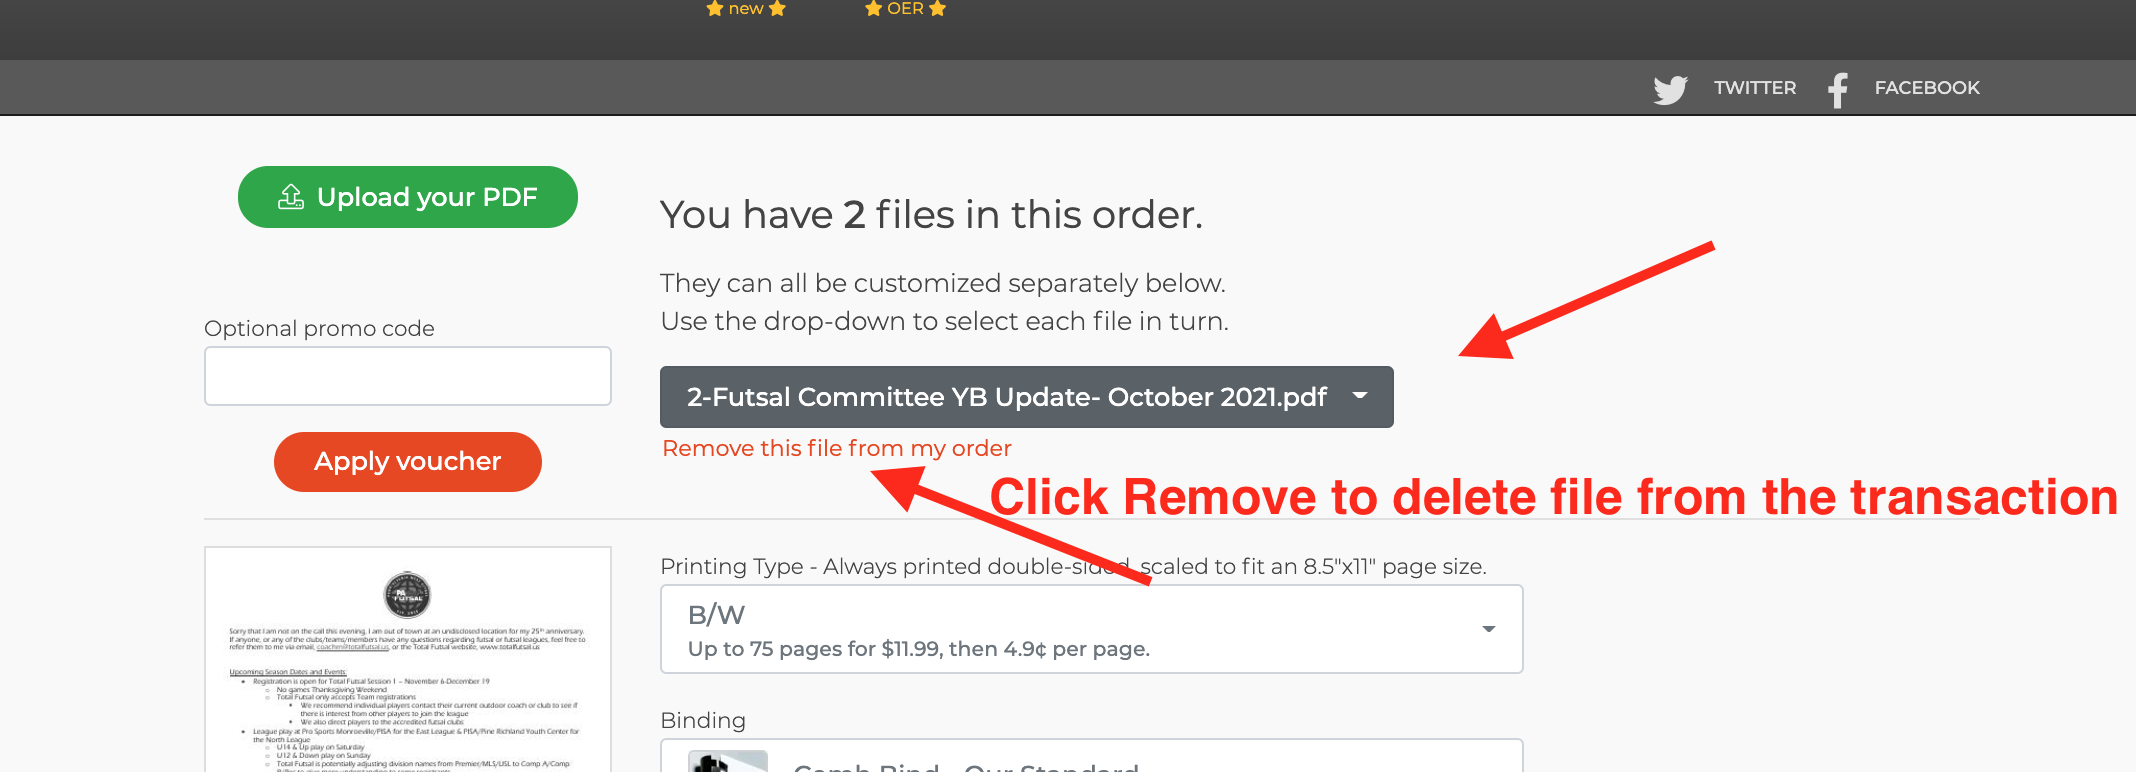
Not Generating any shipments after uploading a CSV
As soon as you upload your CSV, the names and addresses should appear almost immediately. If they are incorrect, error notices will appear. That means you should stop and check your CSV. Some common issues:
-The CSV should have a header row, then the data. Or, you can just have the data but be sure to deselect the box "My CSV has a header row". No other cells should be there.
-This feature only works with US Addresses. If you have addresses to other countries they will cause an error. Remove those. We can assist with them manually, after the CSV order is placed.
-If you have an issue with the CSV and need some direction, please contact us. We will reply back and ask for the CSV.
Not generating any print charges after uploading a CSV
A print needs an address to send to. If there is an error in the CSV formatting, you'll see no charge, or unexpected amounts. See the above section to correct it.
Conclusion
printMe1.com's One to Many™ feature allows one person to send a print or set of prints to many people in a single transaction. This feature is extremely useful for sending print to everyone in a large group setting and where the group leader wants to initiate the order for everyone to receive the same shipment of prints. It's powerful yet also extremely easy to use. The feature will also allow the primary user to ship different PDF's to specific recipients in the same transaction, which we will cover later.
Formatting the CSV is easy and we included specifics on how to do that. The CSV data has precedence over any any details collected prior to applying the CSV to the order.
The group leader initiates the order by uploading the PDF or set of PDF's each recipient will receive, chooses the printing, and binding options for the PDF(s), then uploads the names and addresses in a CSV format. The final step is to pay for the order using a credit card or purchasing card. The process follows our standard Simple Print Service™ order flow, except a CSV is uploaded in Shipping to provide the recipients' details. Simple!
The site automatically calculates the printing, binding, and shipping charges based on the number of recipients in the CSV. Once payment is completed, the site processes a print job for each recipient as if they placed their own individual orders, and printing begins soon after the order is placed. The pricing is our standard pricing as if each recipient placed their order individually. Most One to Many™ jobs ship in under 48 business hours like any other job, although for lists over 100 users, an extra 24 hours may be added per 75 additional recipients.
If you have any questions on using this feature, please contact us here.
"One to Many" and "Simple Print Service" are trademarks of egrafa, inc. D/B/A printMe1.com


![Single-Sided PDF Printing [Updated 4-8-24]](http://public/images/530/blog/upload/25b15134-header.jpeg)


![PDF's of enacted US Laws, Federal Court, and other US publications reformatted for Easy-to-Read Printing in US Letter Formats- Free downloads [Updated 8/15/25]](http://public/images/530/blog/upload/5aed875-abraham-lincoln-memorial-1920x1080.jpg)


